Checkerboards, Potato Chips, and BOMs – Blog Readers Share

Today’s blog post is a veritable smorgasboard of quilts and quilt blocks submitted by blog readers. Enjoy feasting your eyes!

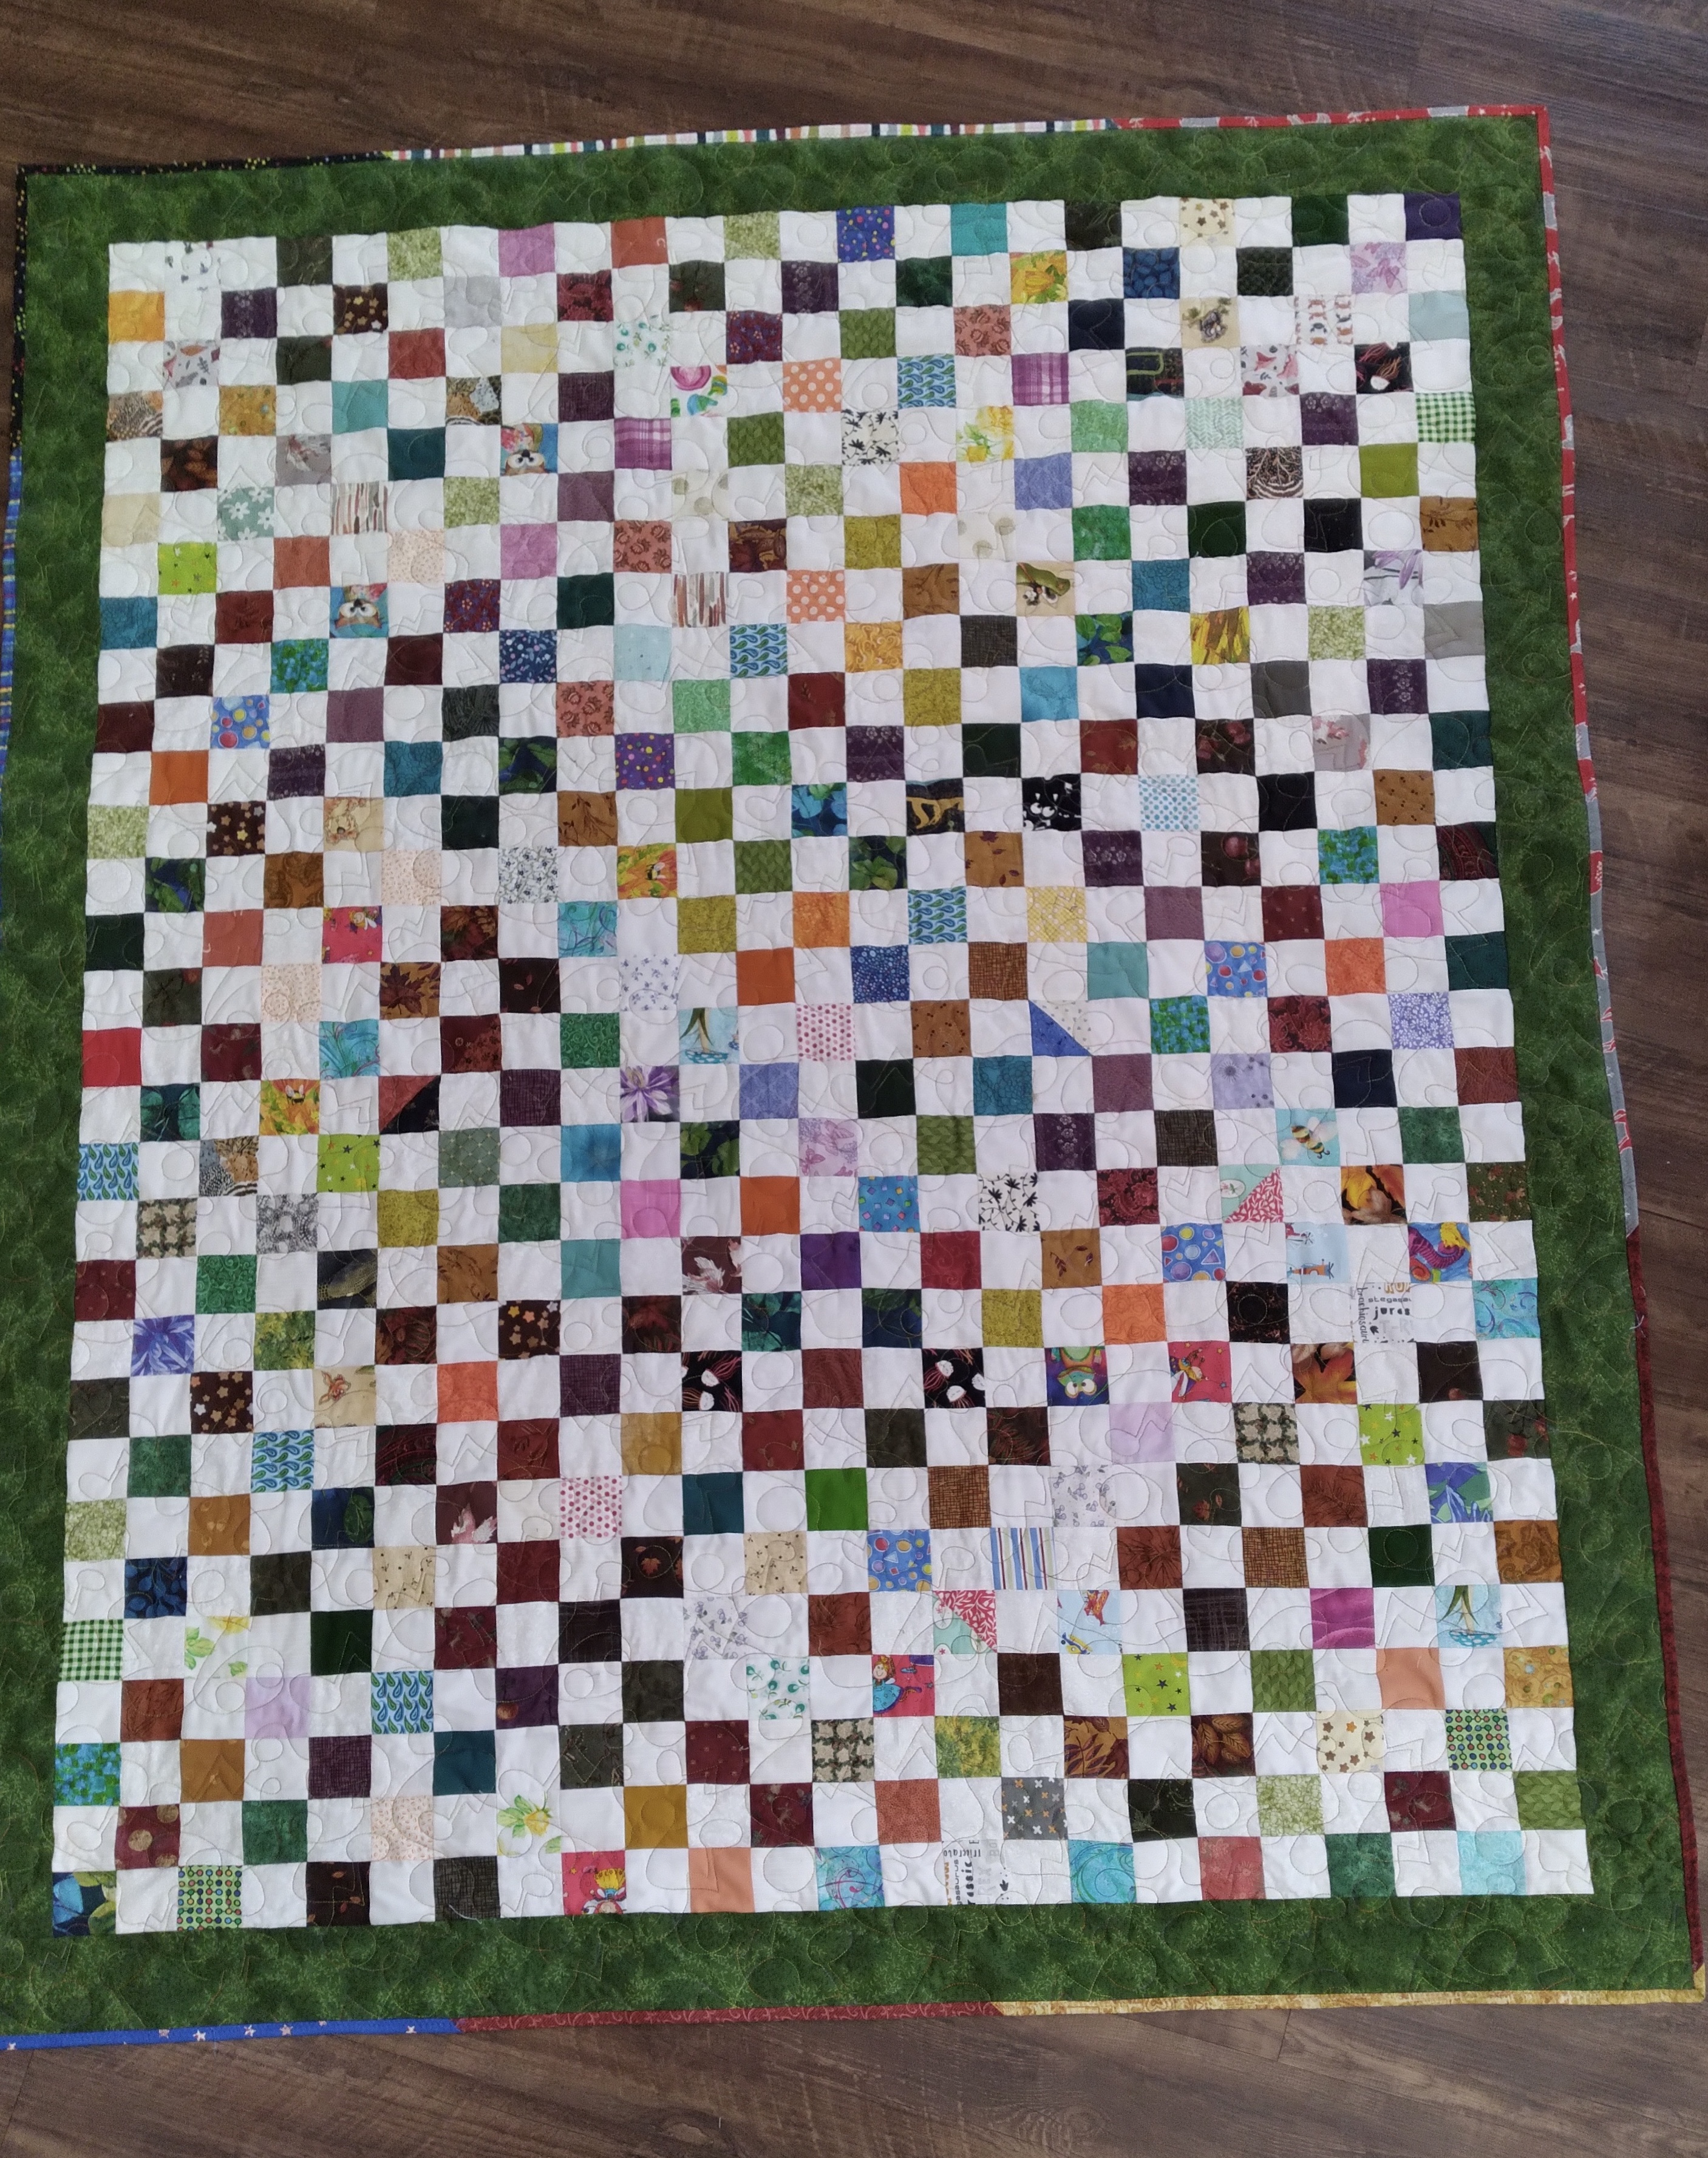
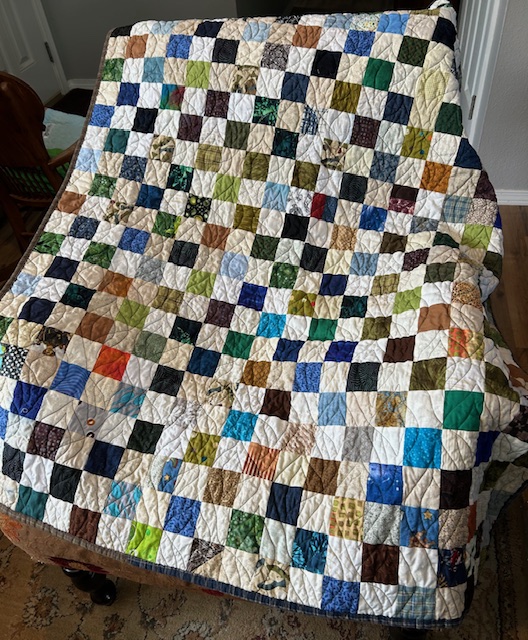
First up is a Checkerboard quilt made by Becky B. She used scraps of brown, green, and blue fabrics, making the project appropriate for a man. Becky has a charitable organization in mind that will welcome her donation.

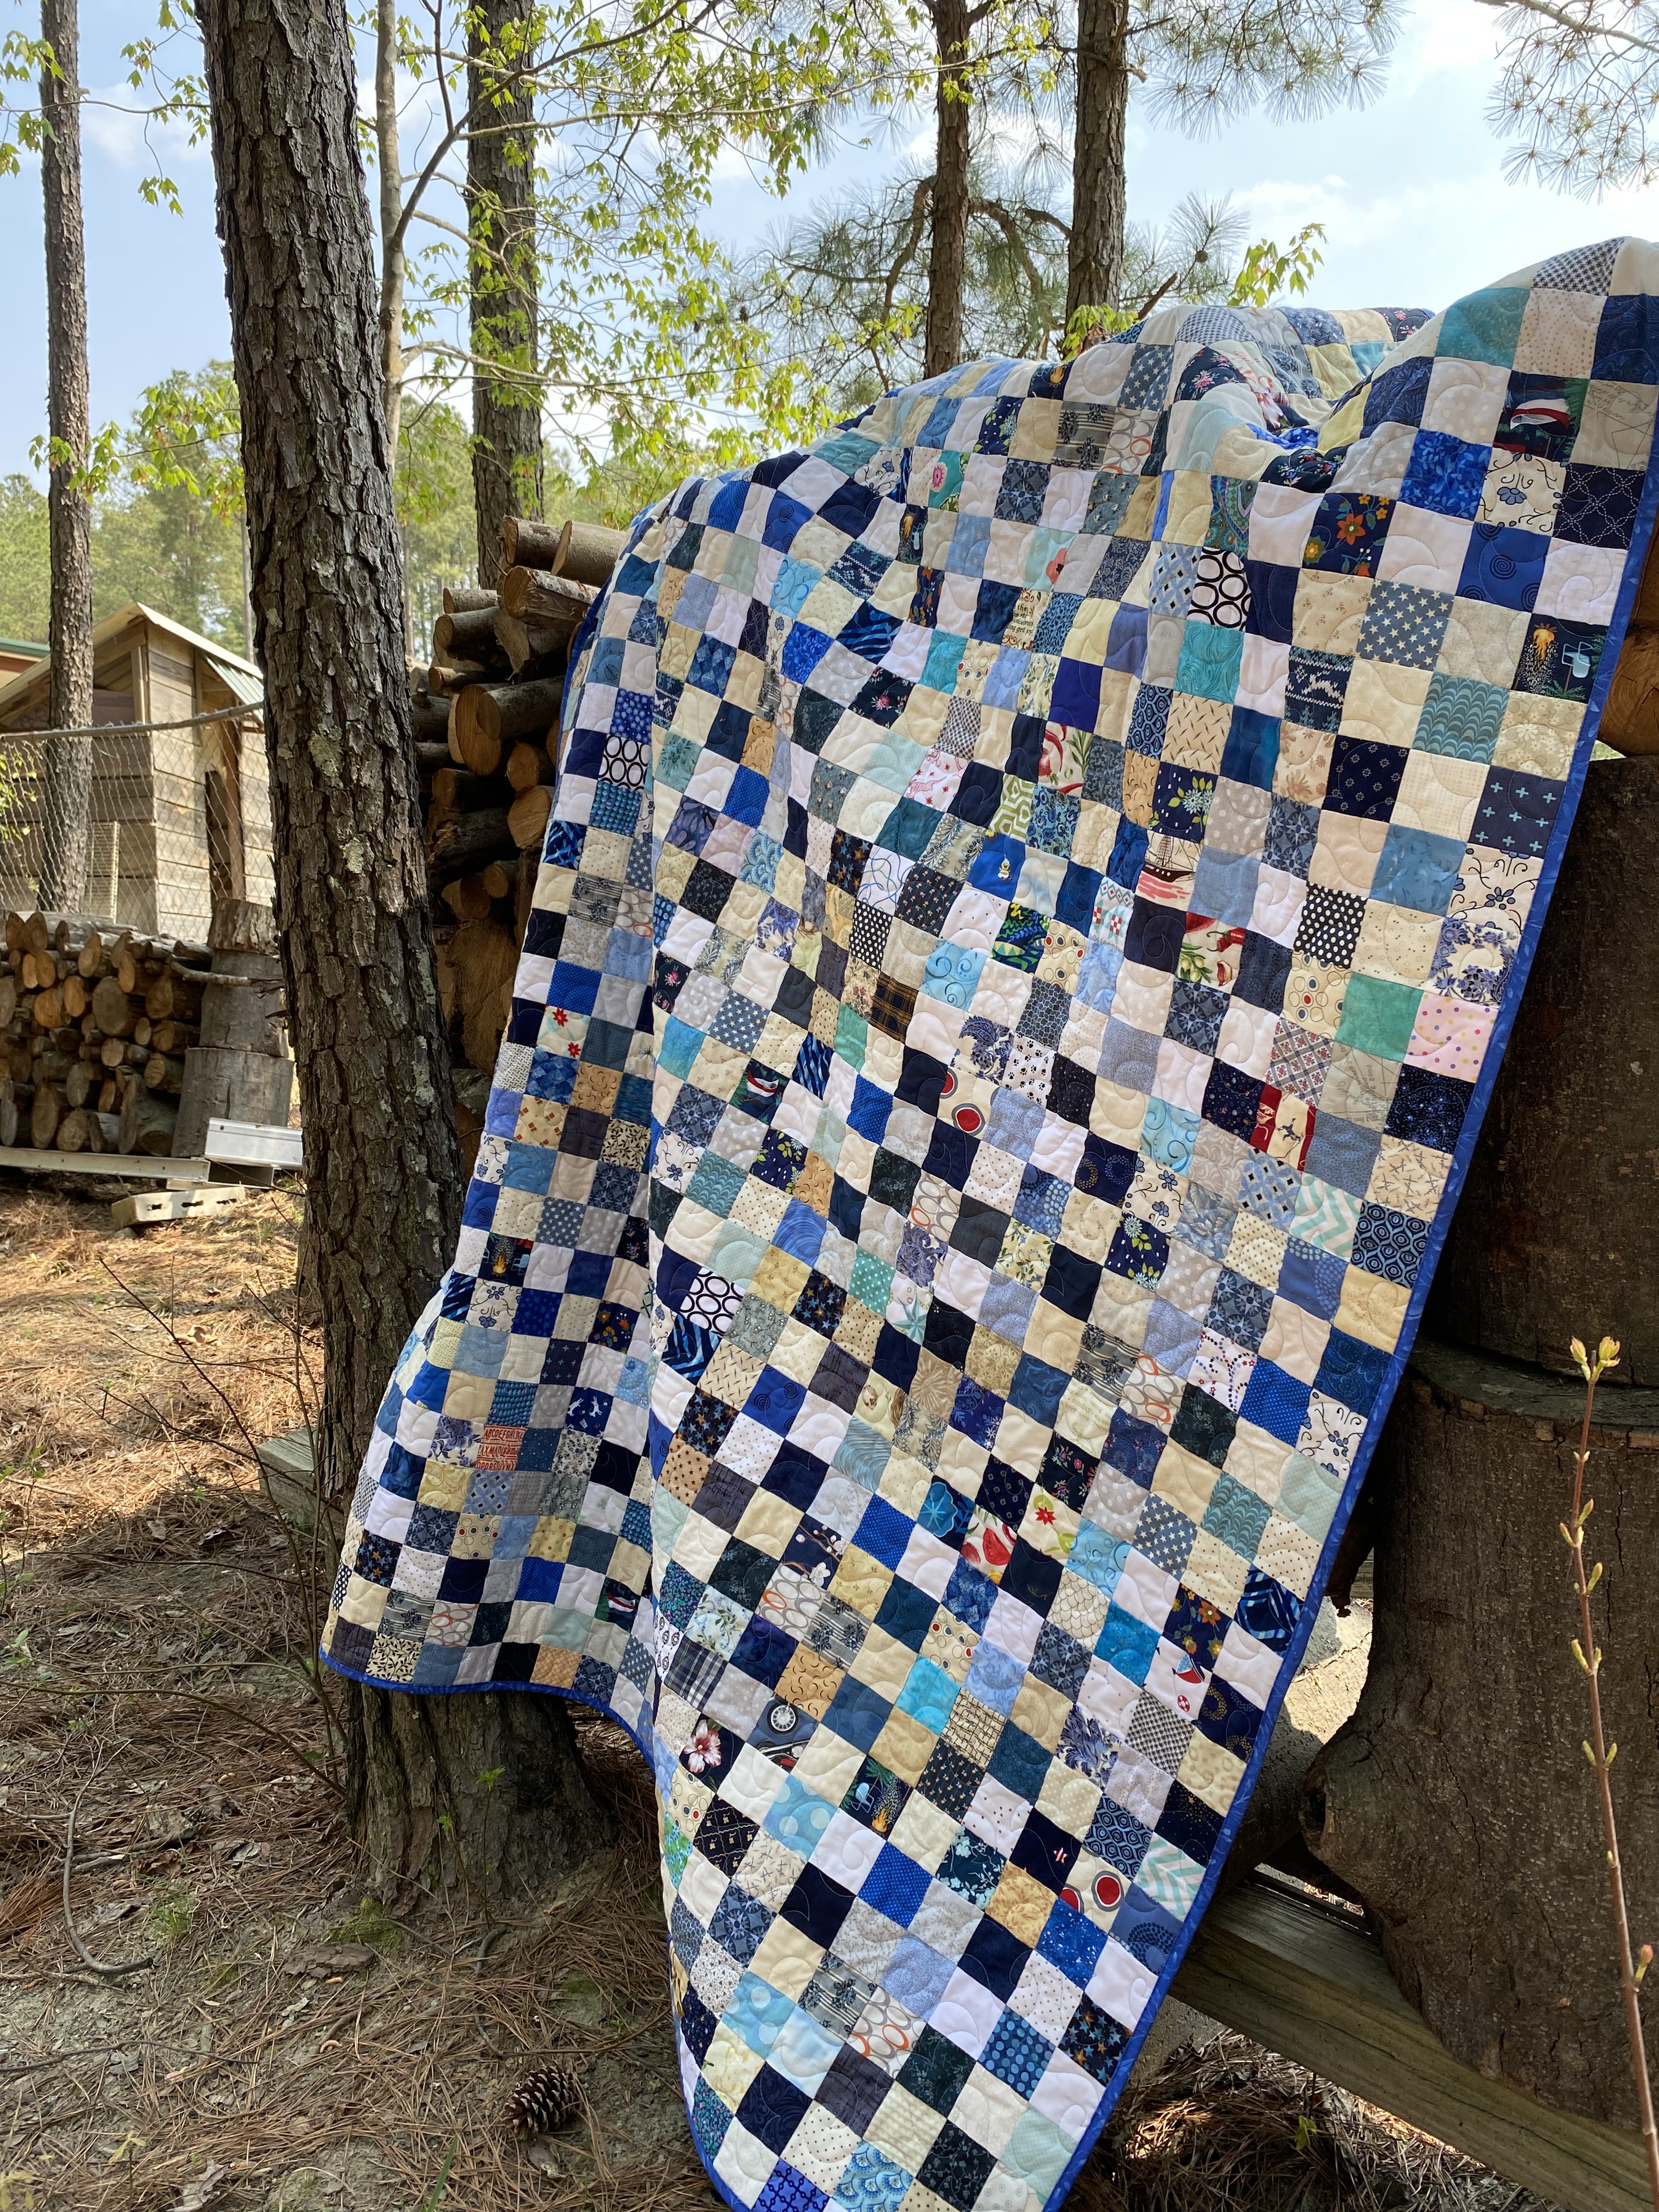
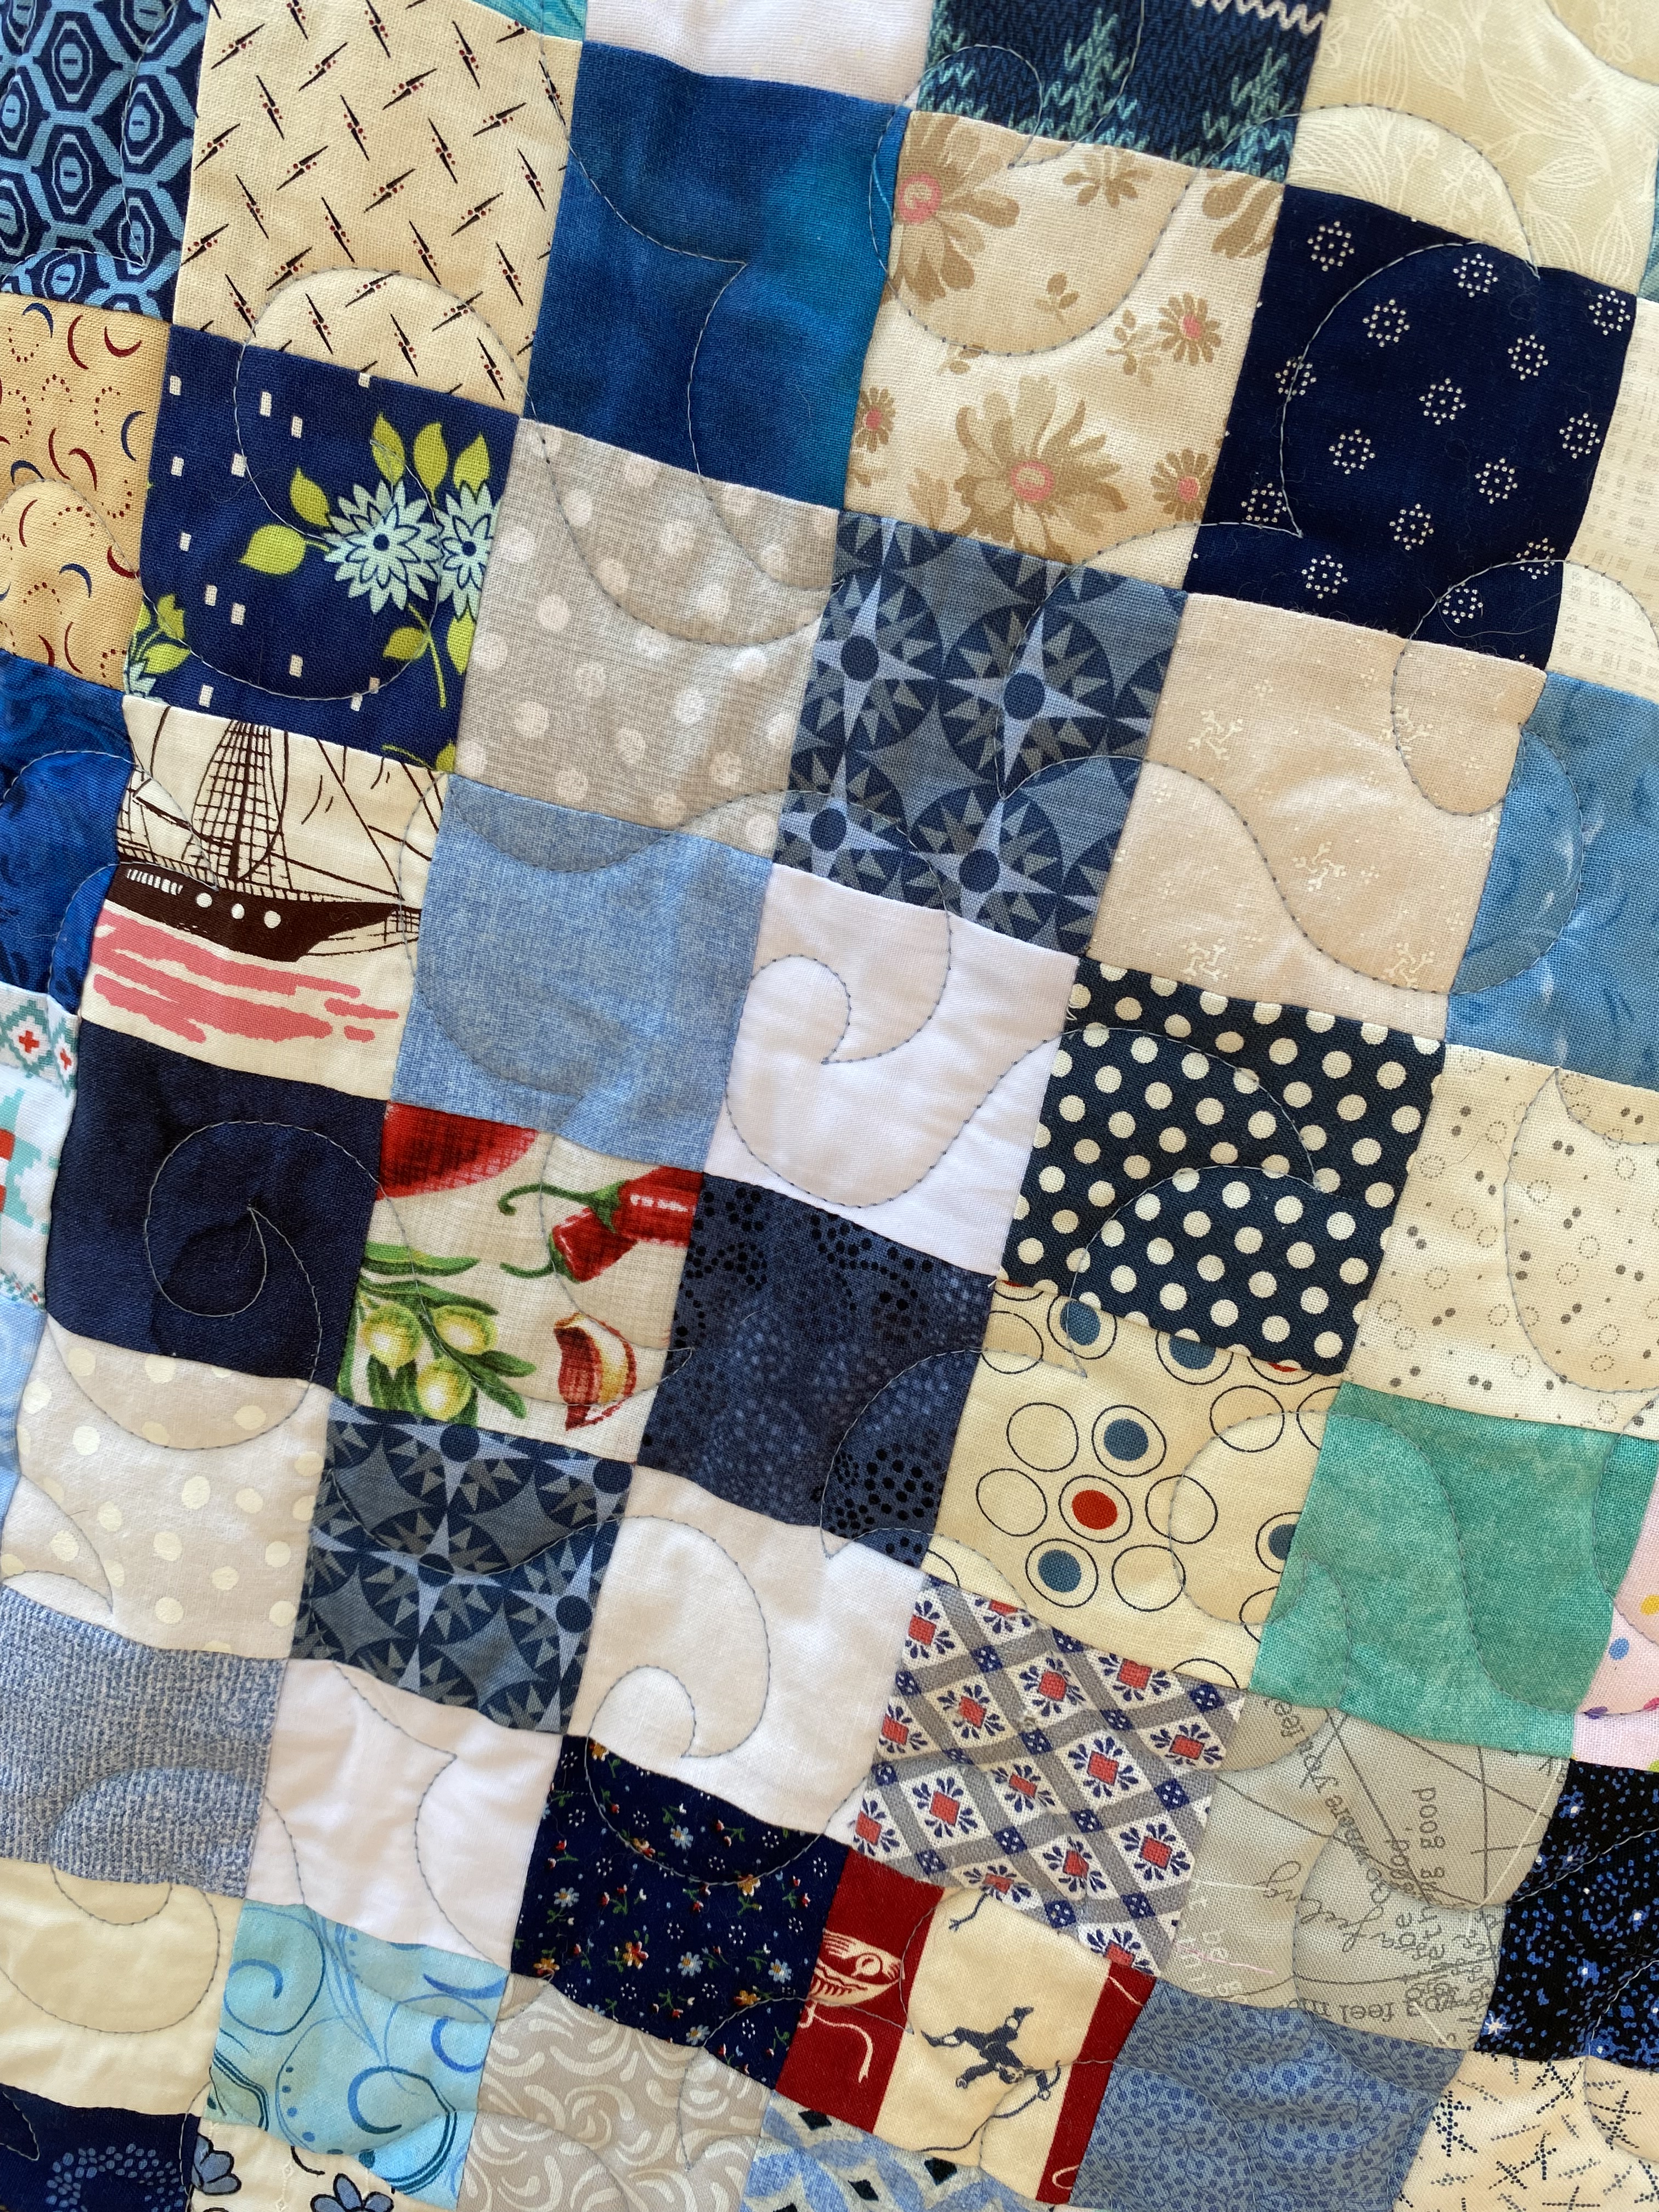
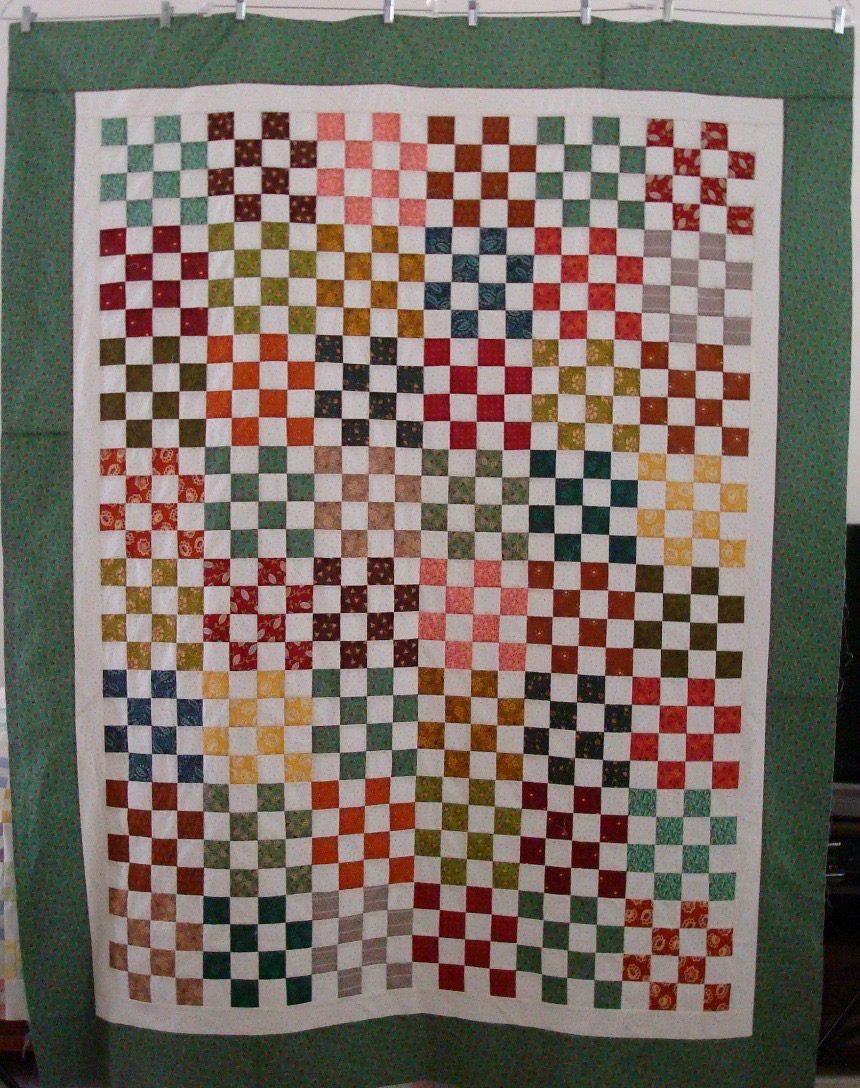
Karlene made her Checkerboard from a half-jelly roll of Kim Diehl’s “Quiet Grace” line. She paired each 2 1/2″ x WOF strip with an off-white background strip, and, after sewing and pressing them, cut them in 2 1/2″ increments. She sewed the resulting sixteen two-patches into two Sixteen Patch blocks, keeping the same color in each block. This idea for constructing a Checkerboard quilt appeals to me just as much as the random blue and white quilt I made. (Click here to view it again.)

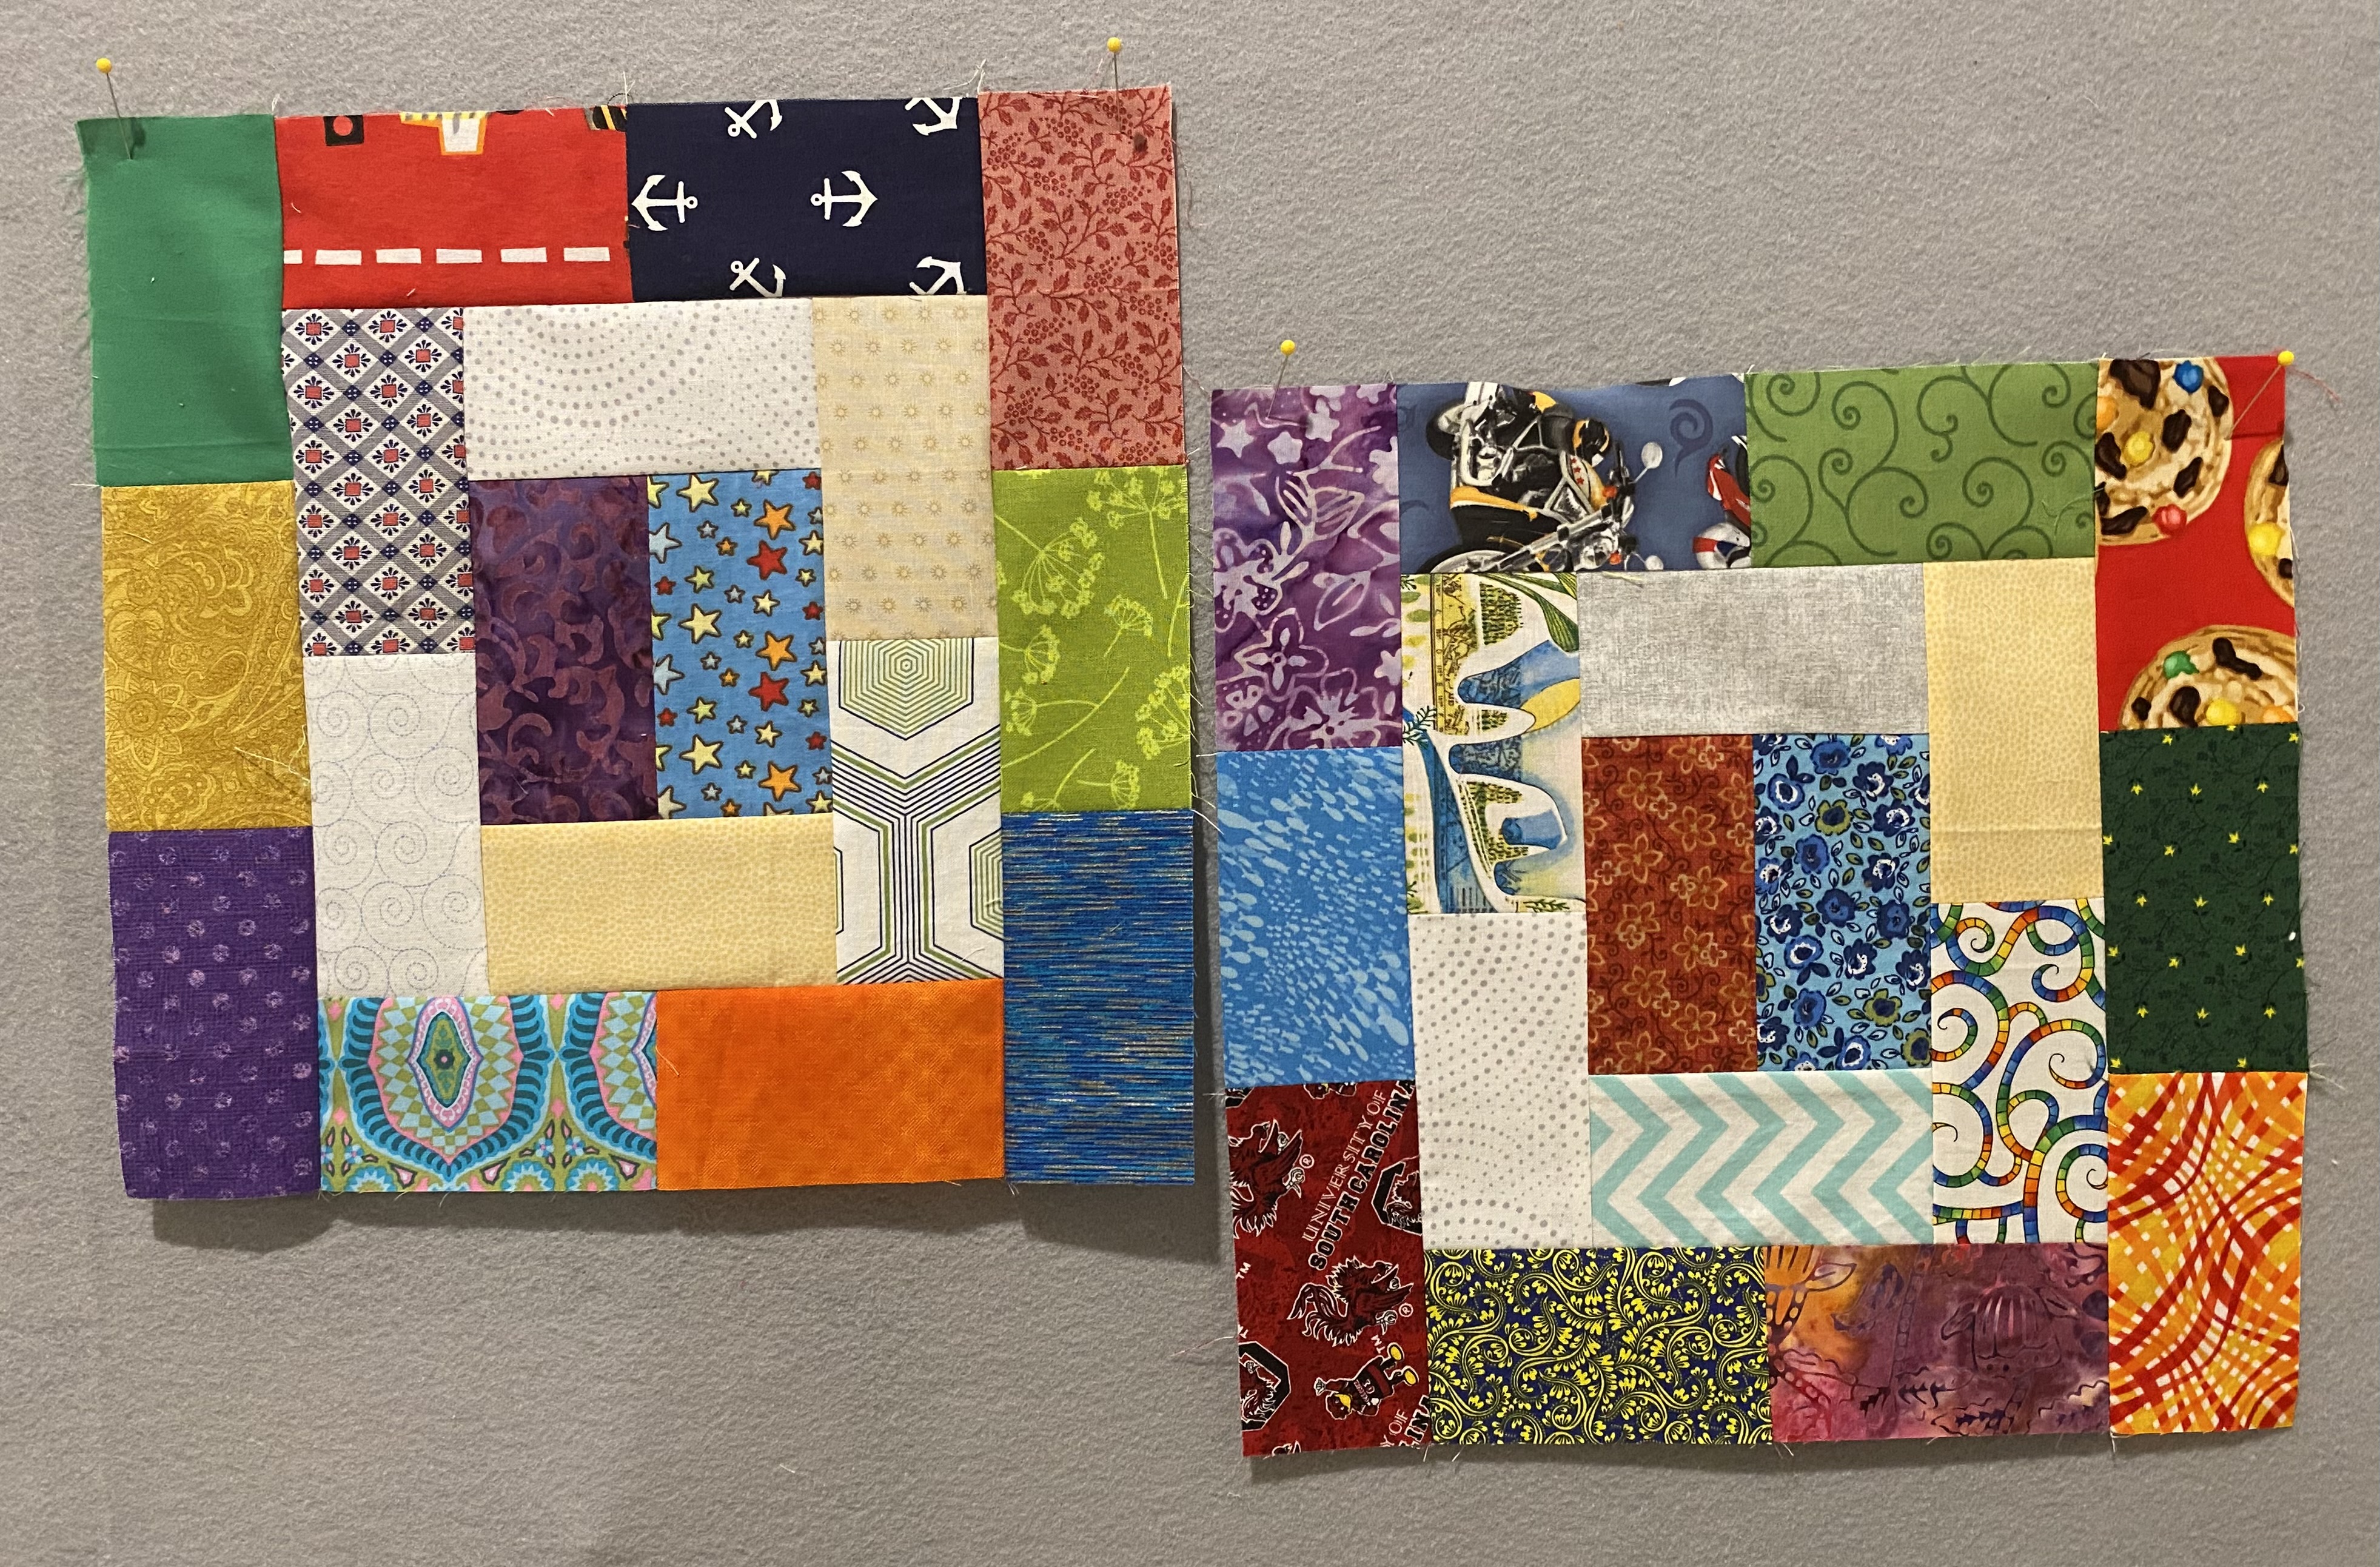
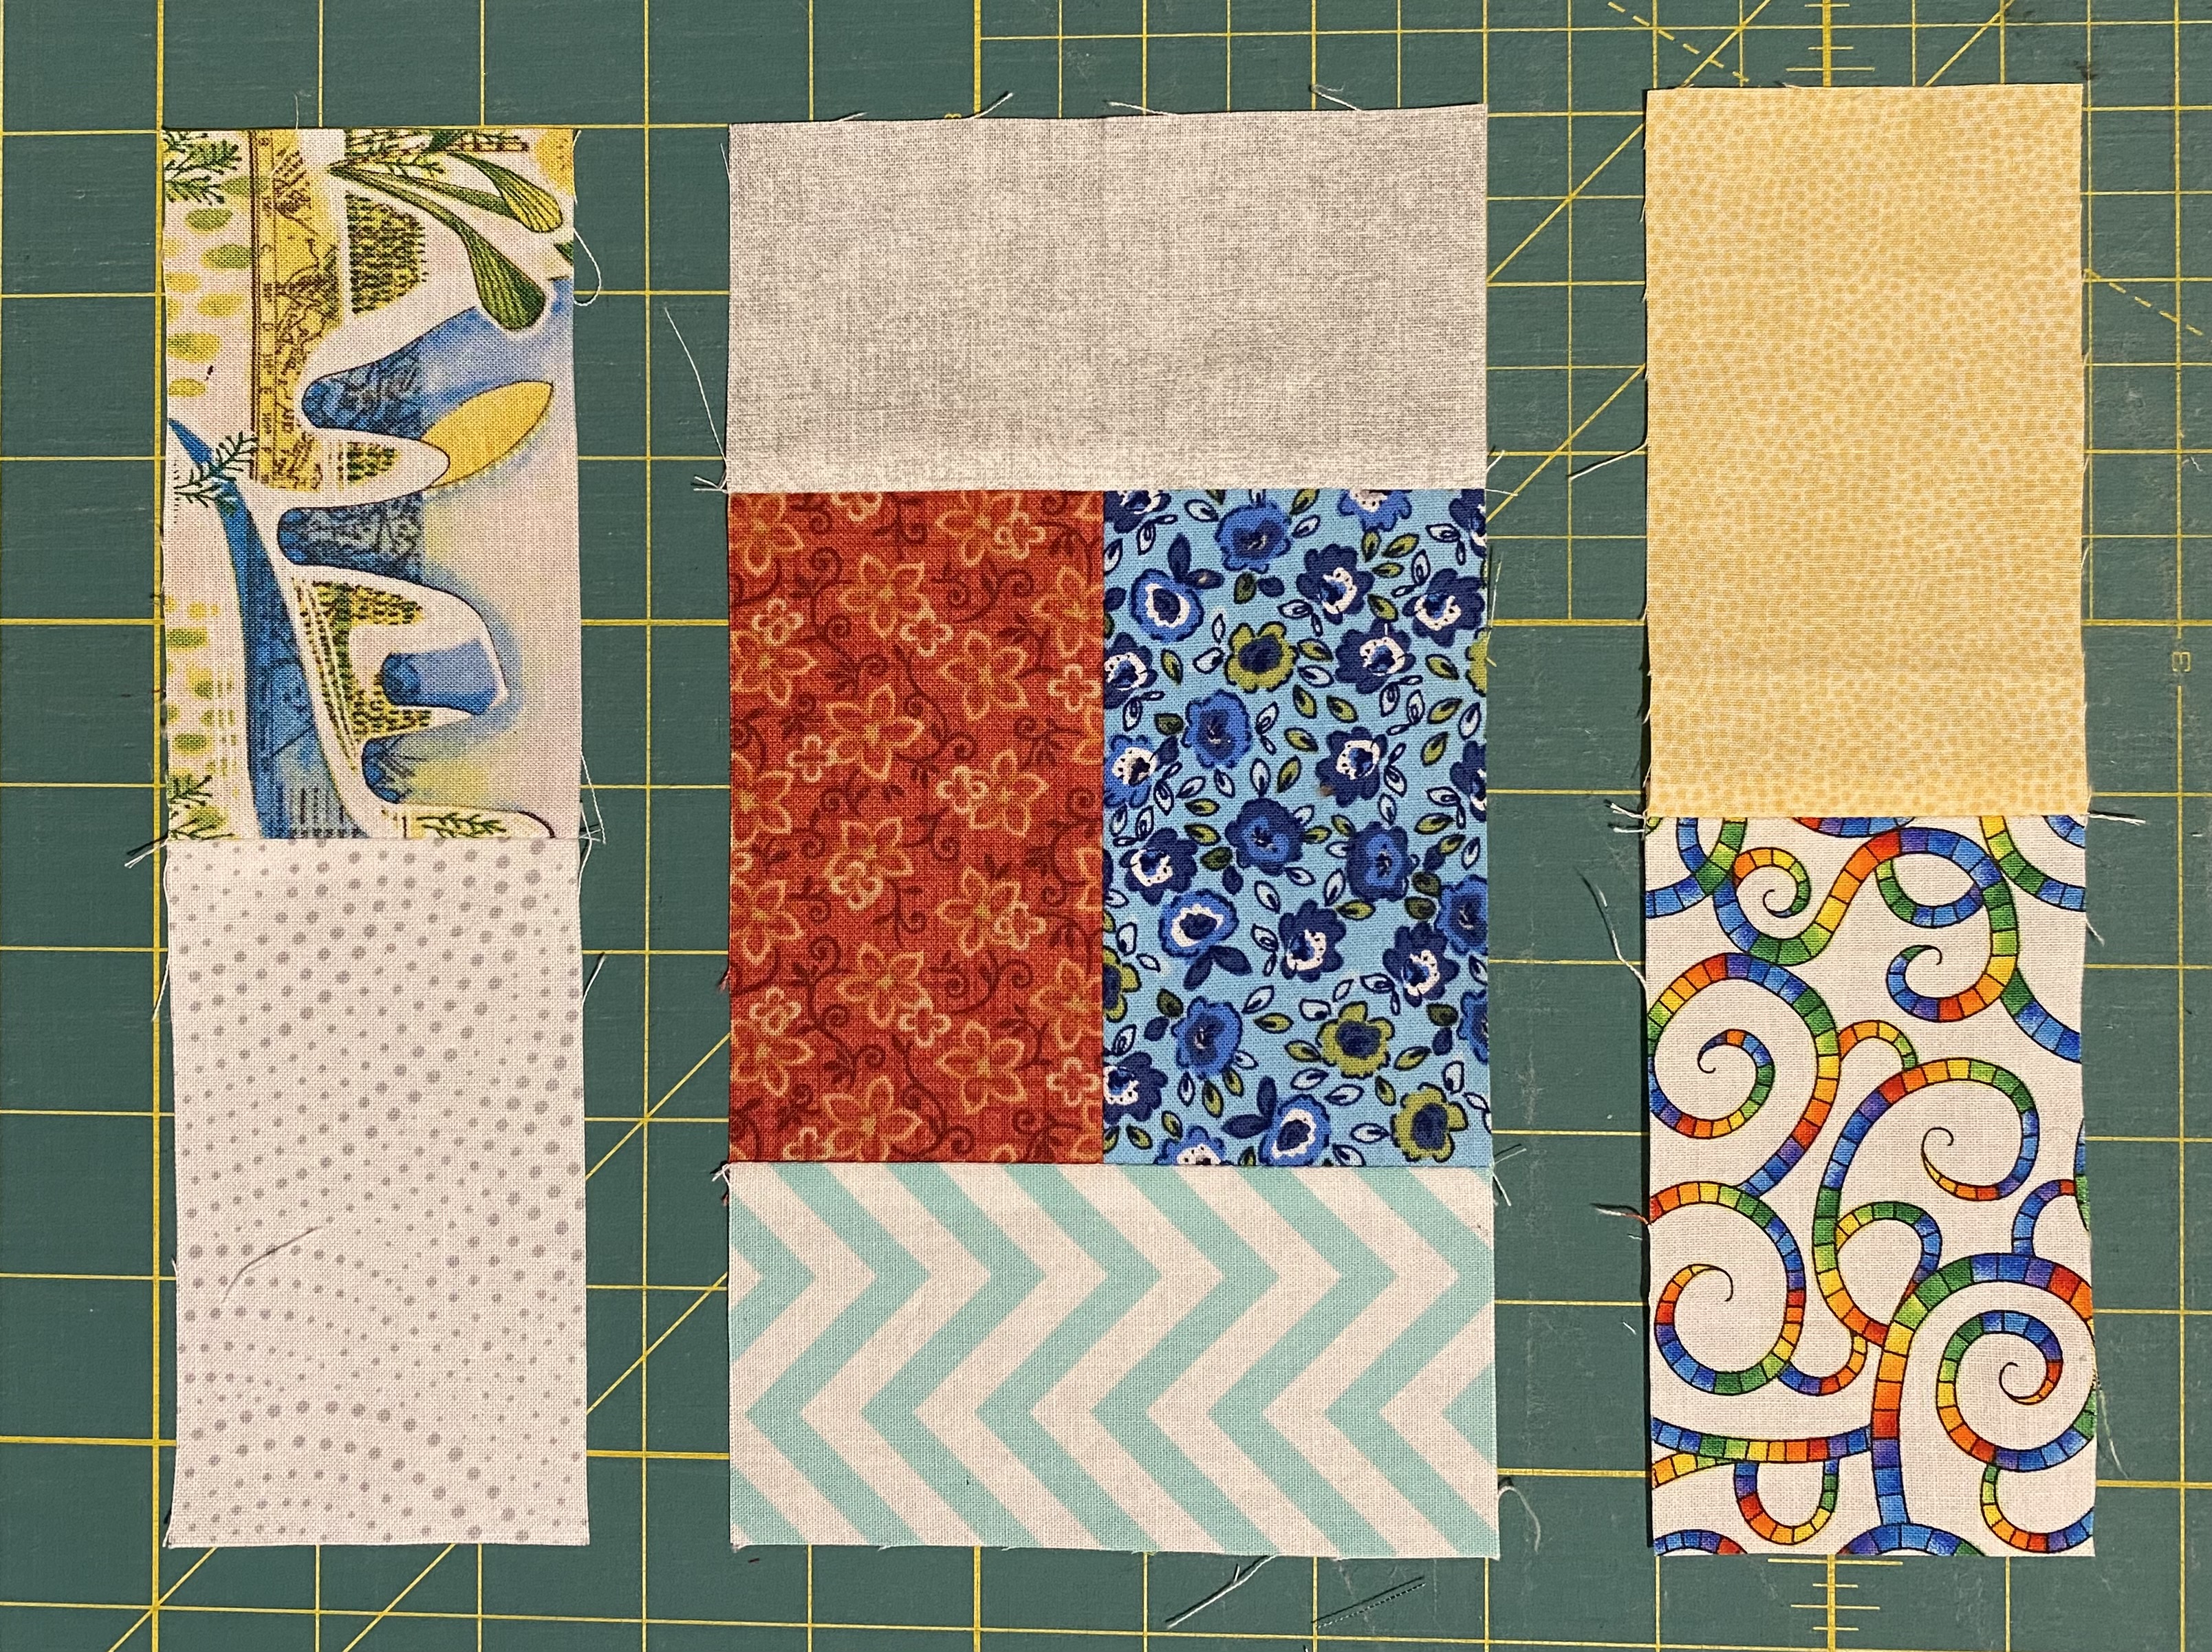
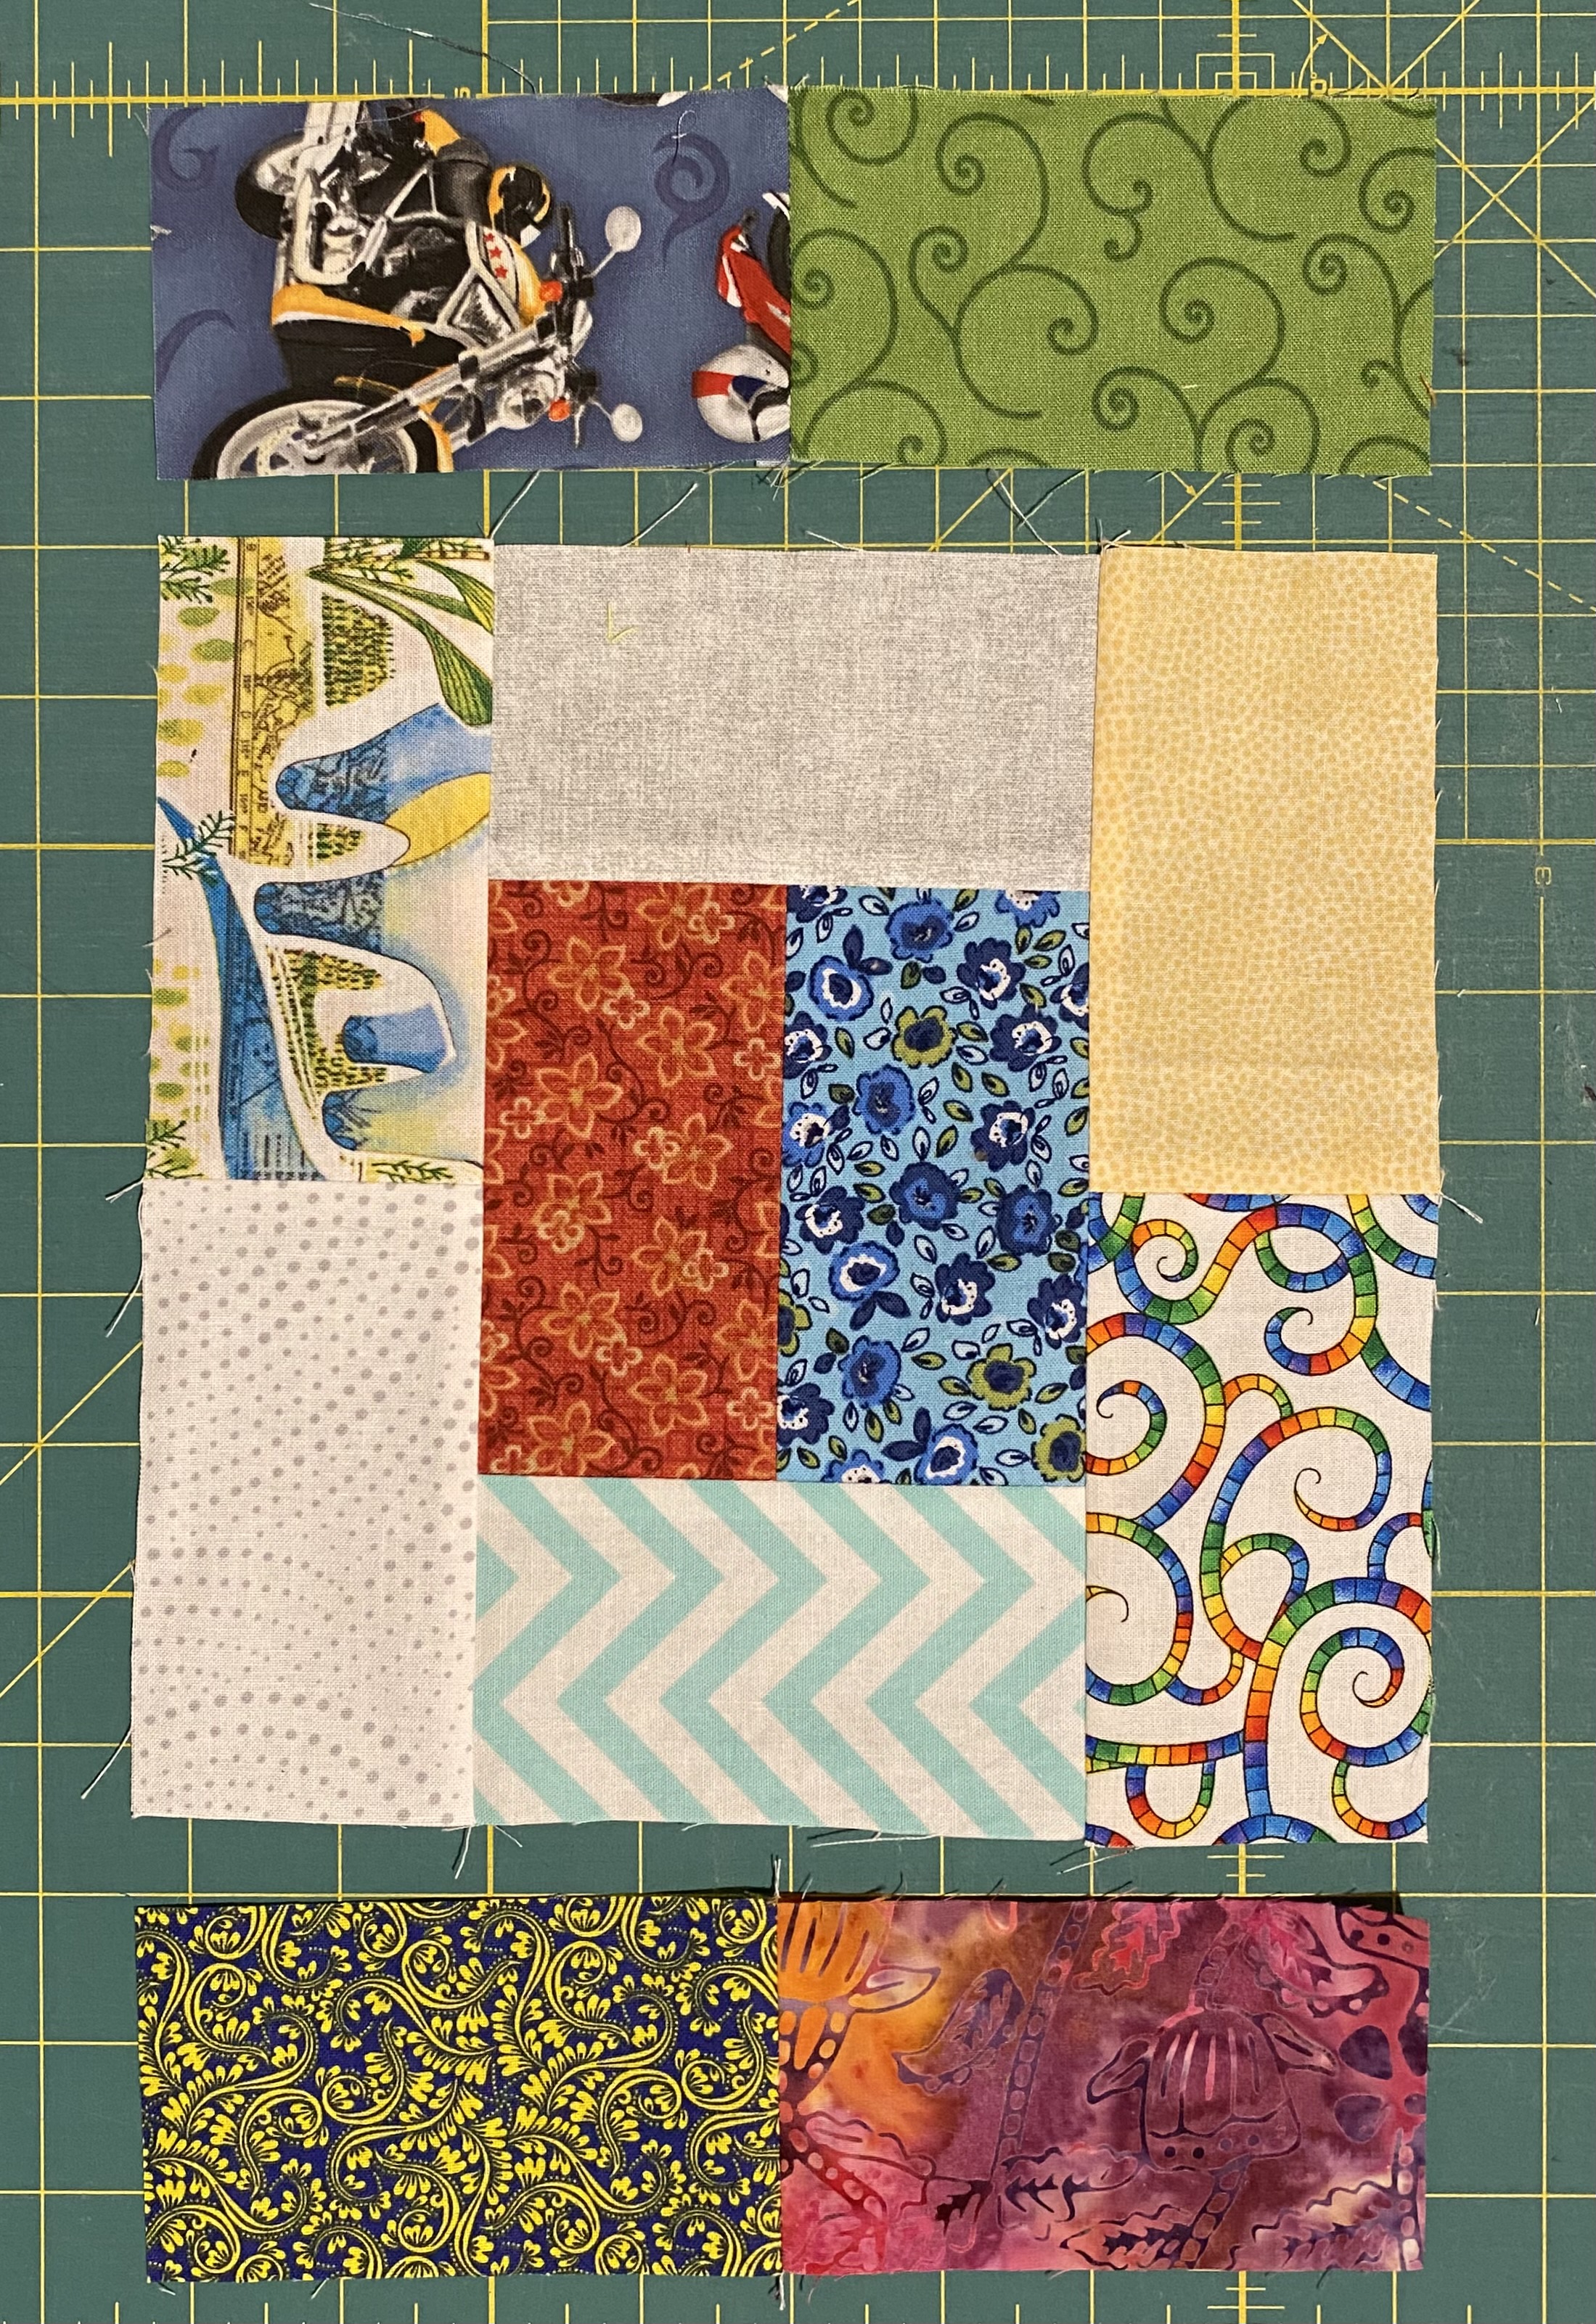
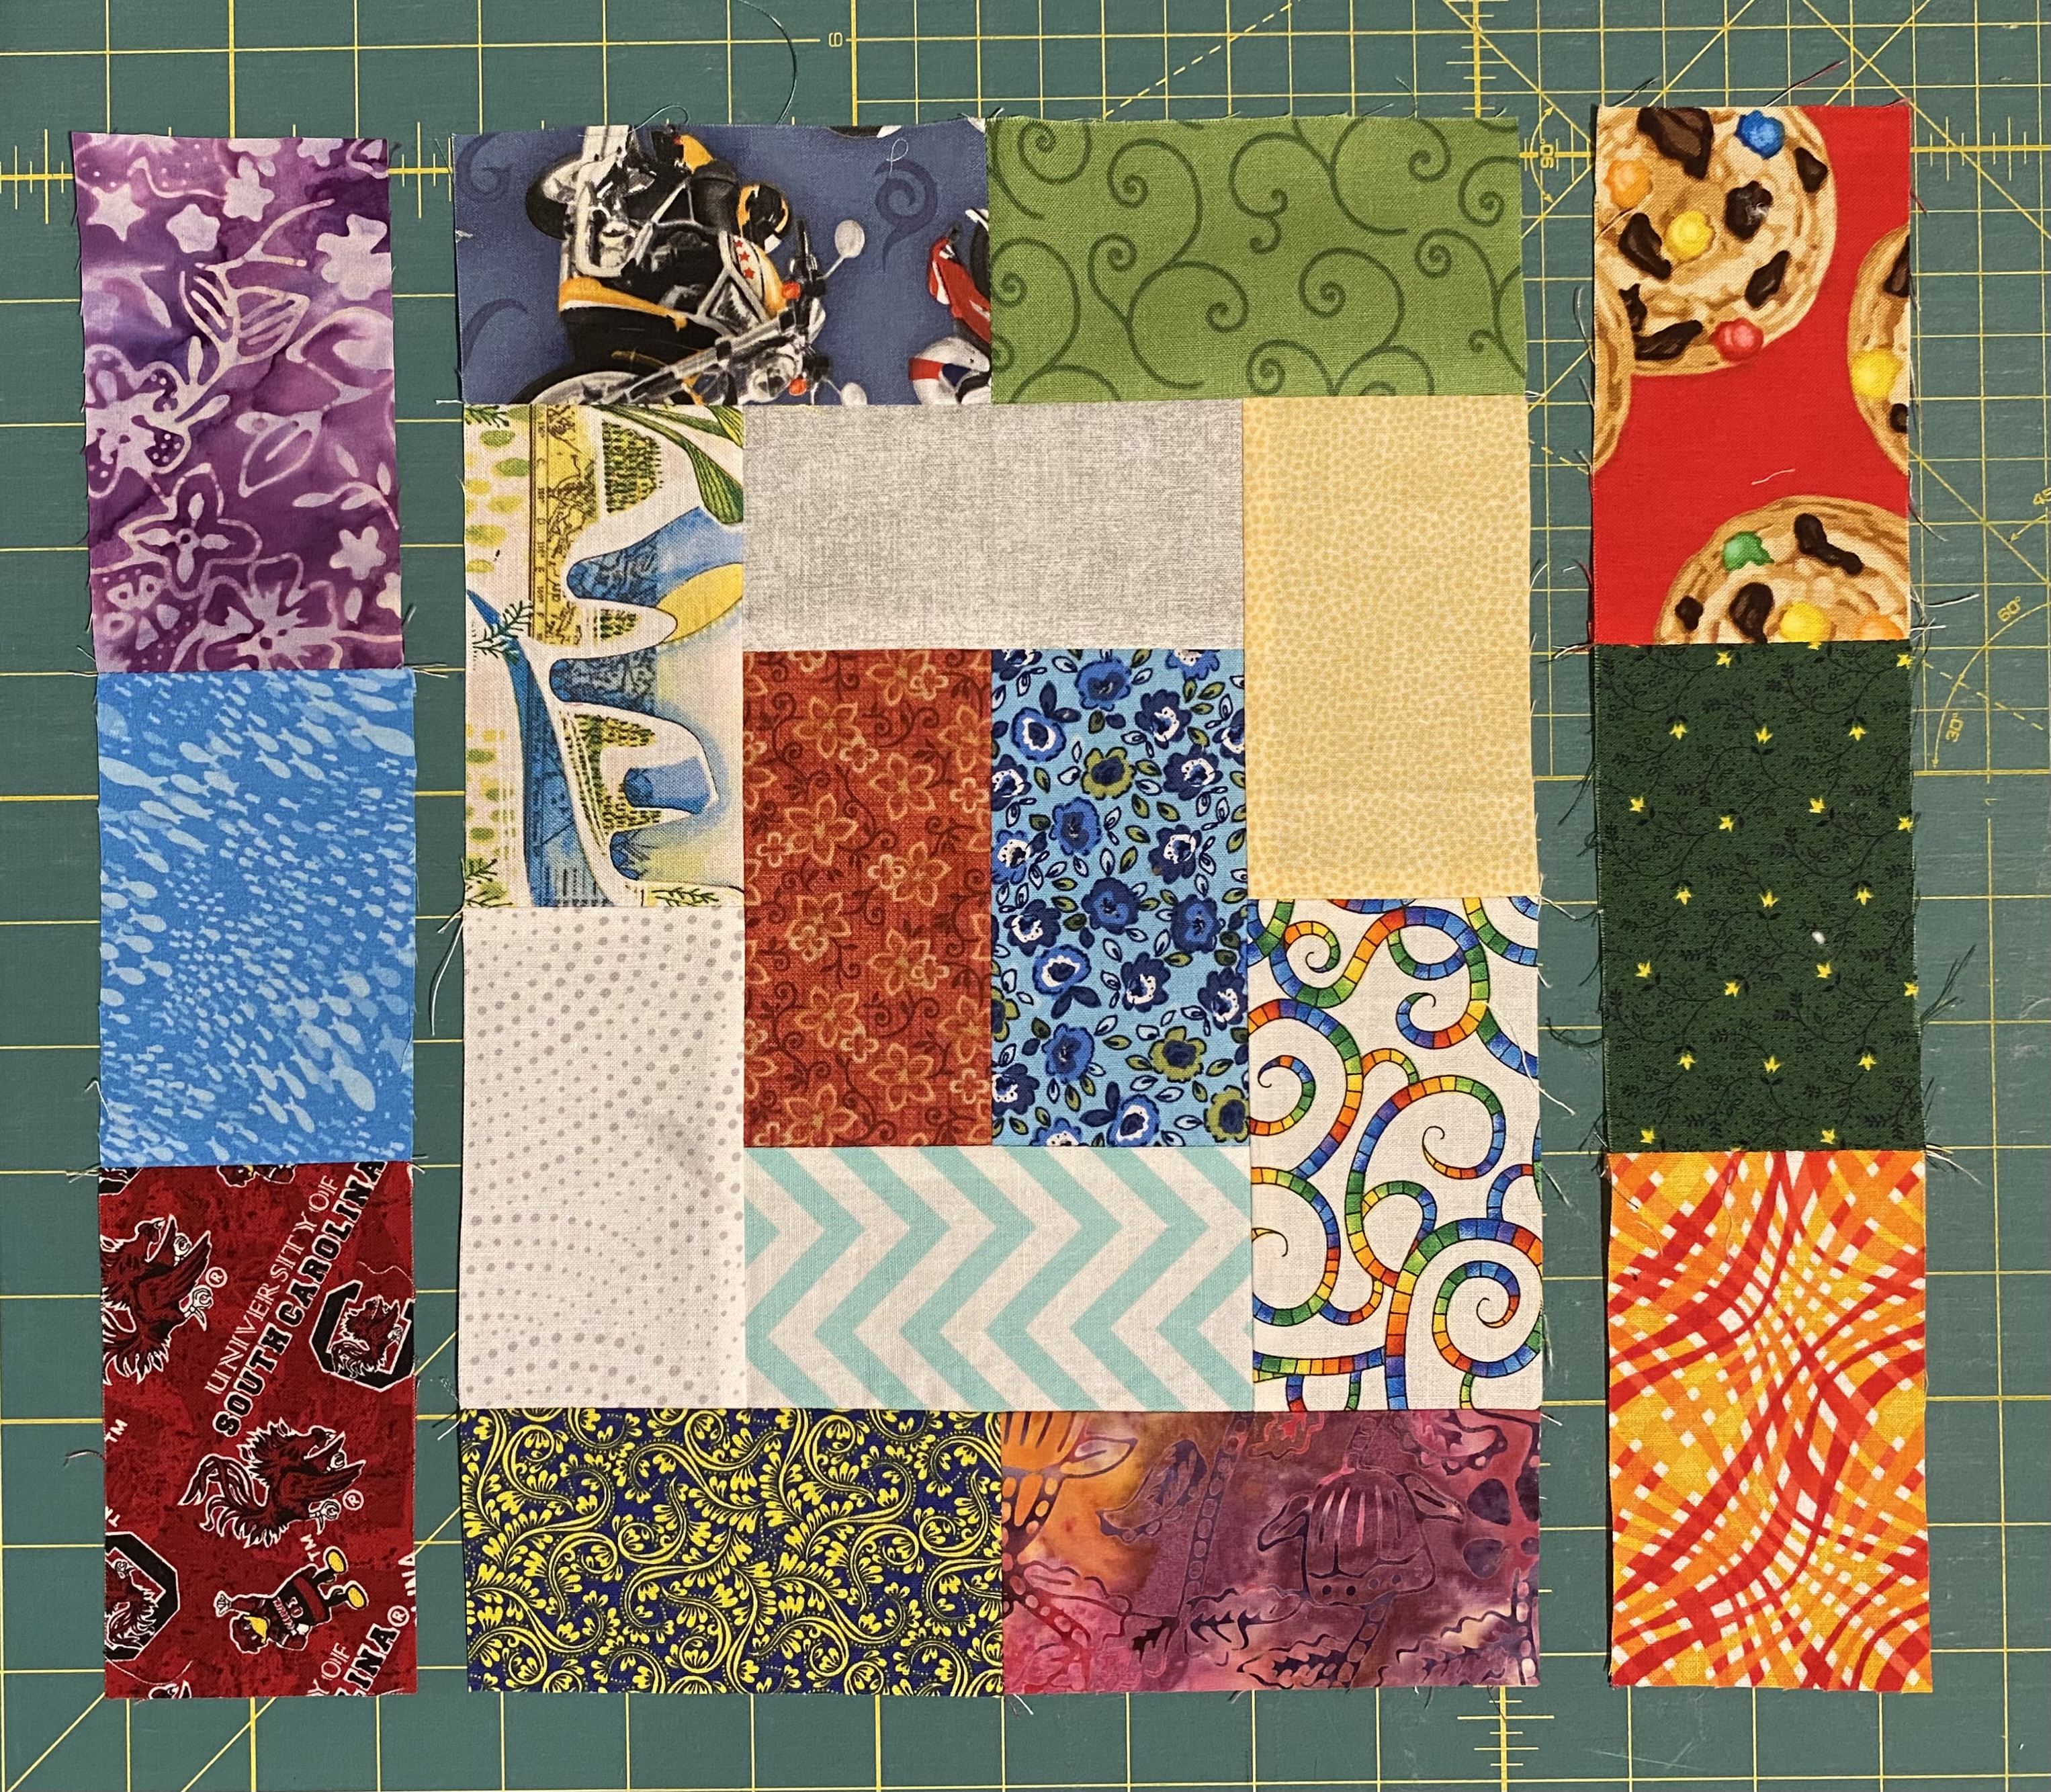
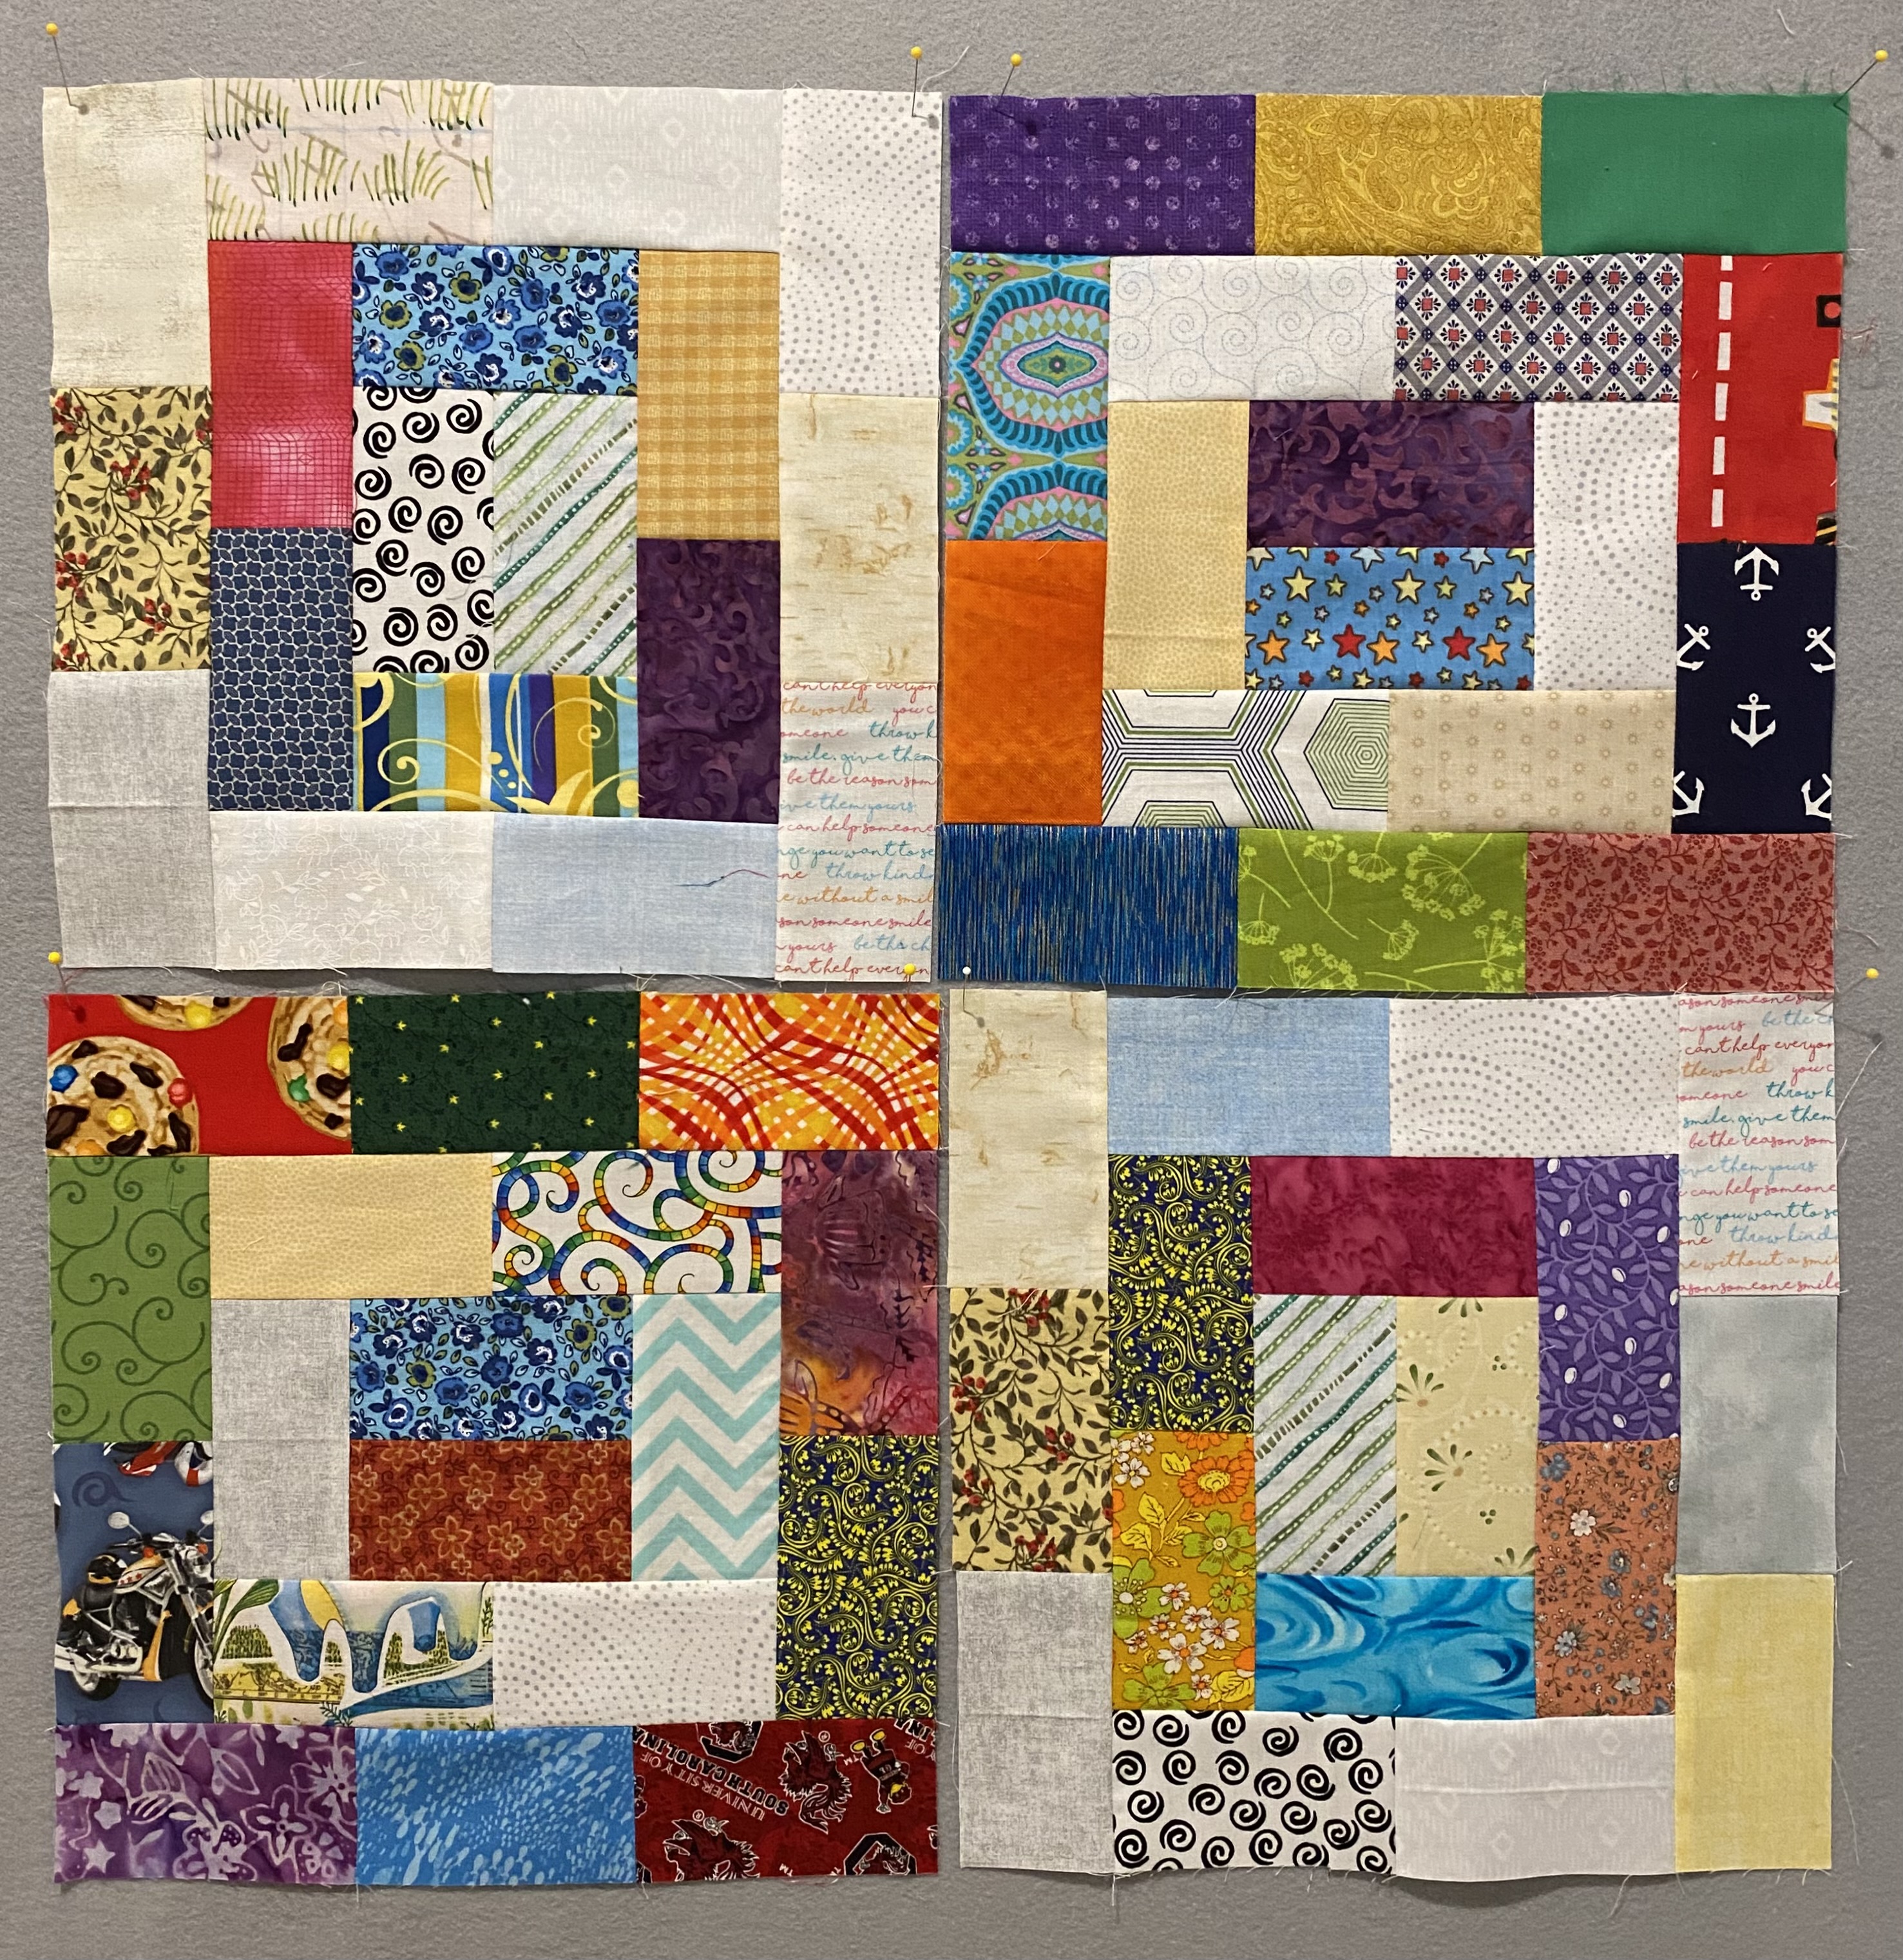
After completing my Checkerboard quilt which used most of my blue scrap 2 1/2″ squares, I began making Potato Chip blocks from 2 1/2″ x 4 1/2″ scrap rectangles. When I showed my blocks to Colleen, she jumped on the bandwagon and cut rectangles for a boy’s quilt and more rectangles for a girl’s quilt. She has already completed the boy’s quilt top. The novelty prints she used make it a fun “I Spy” quilt.

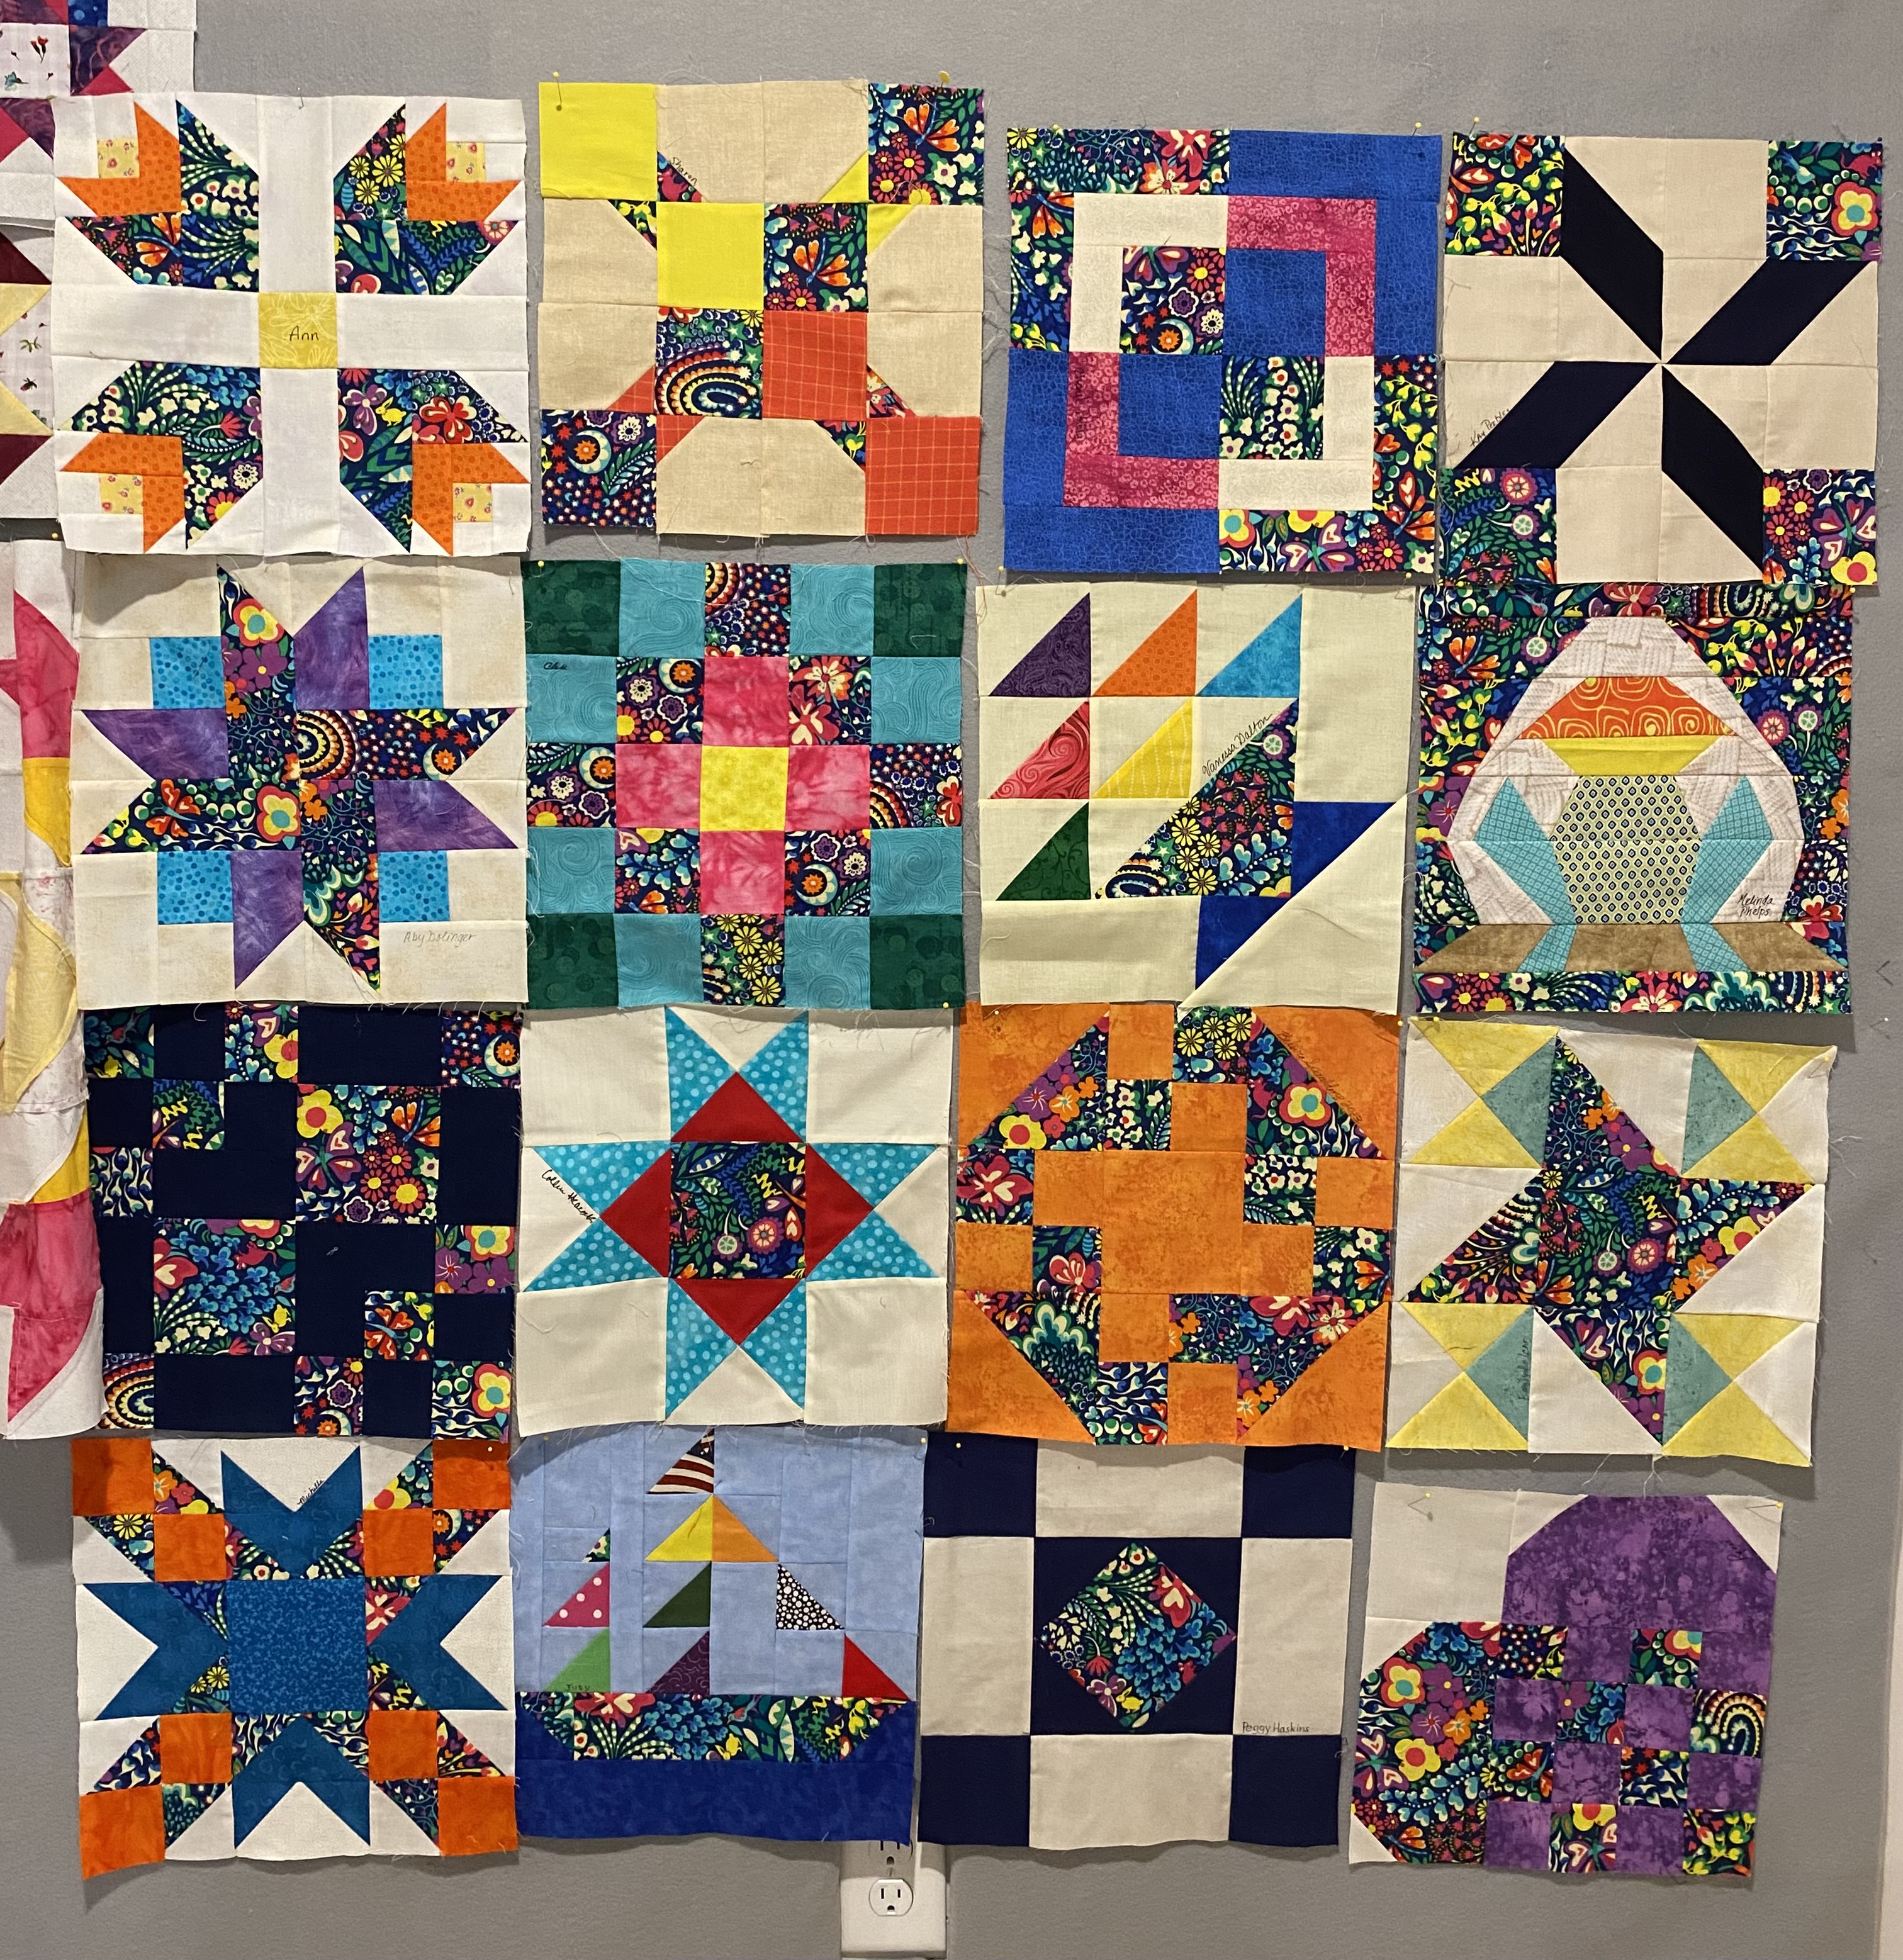
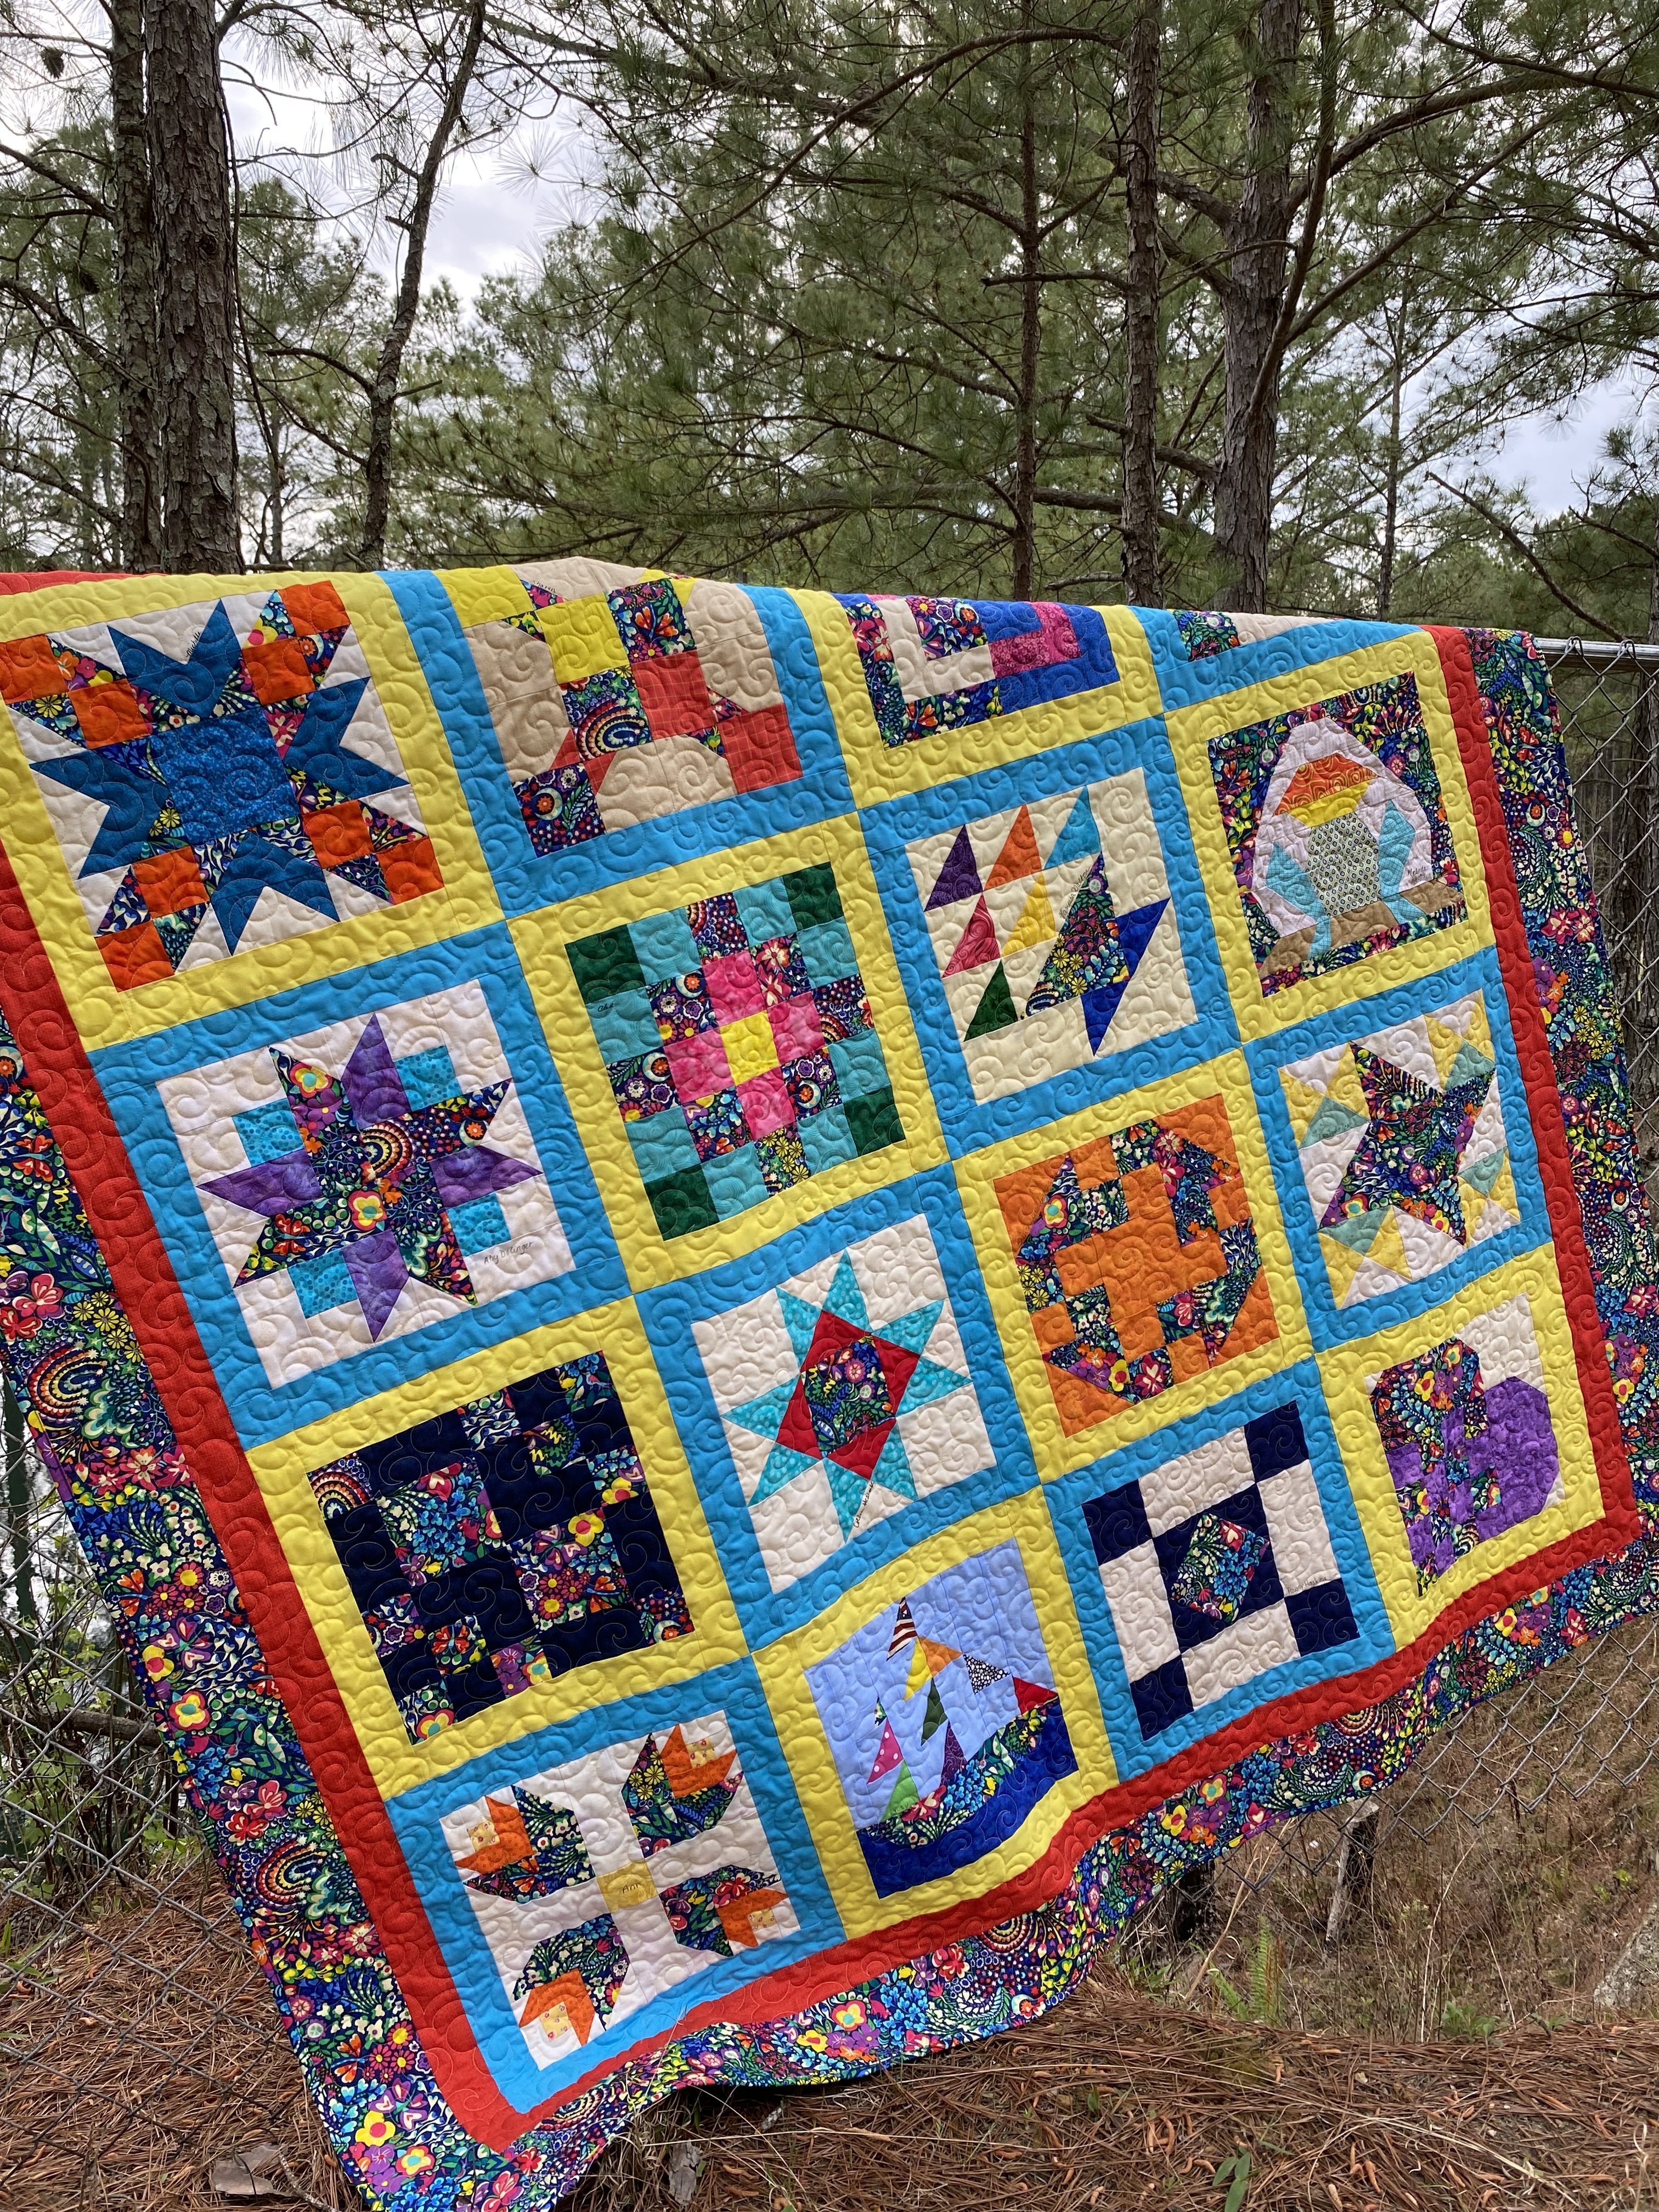
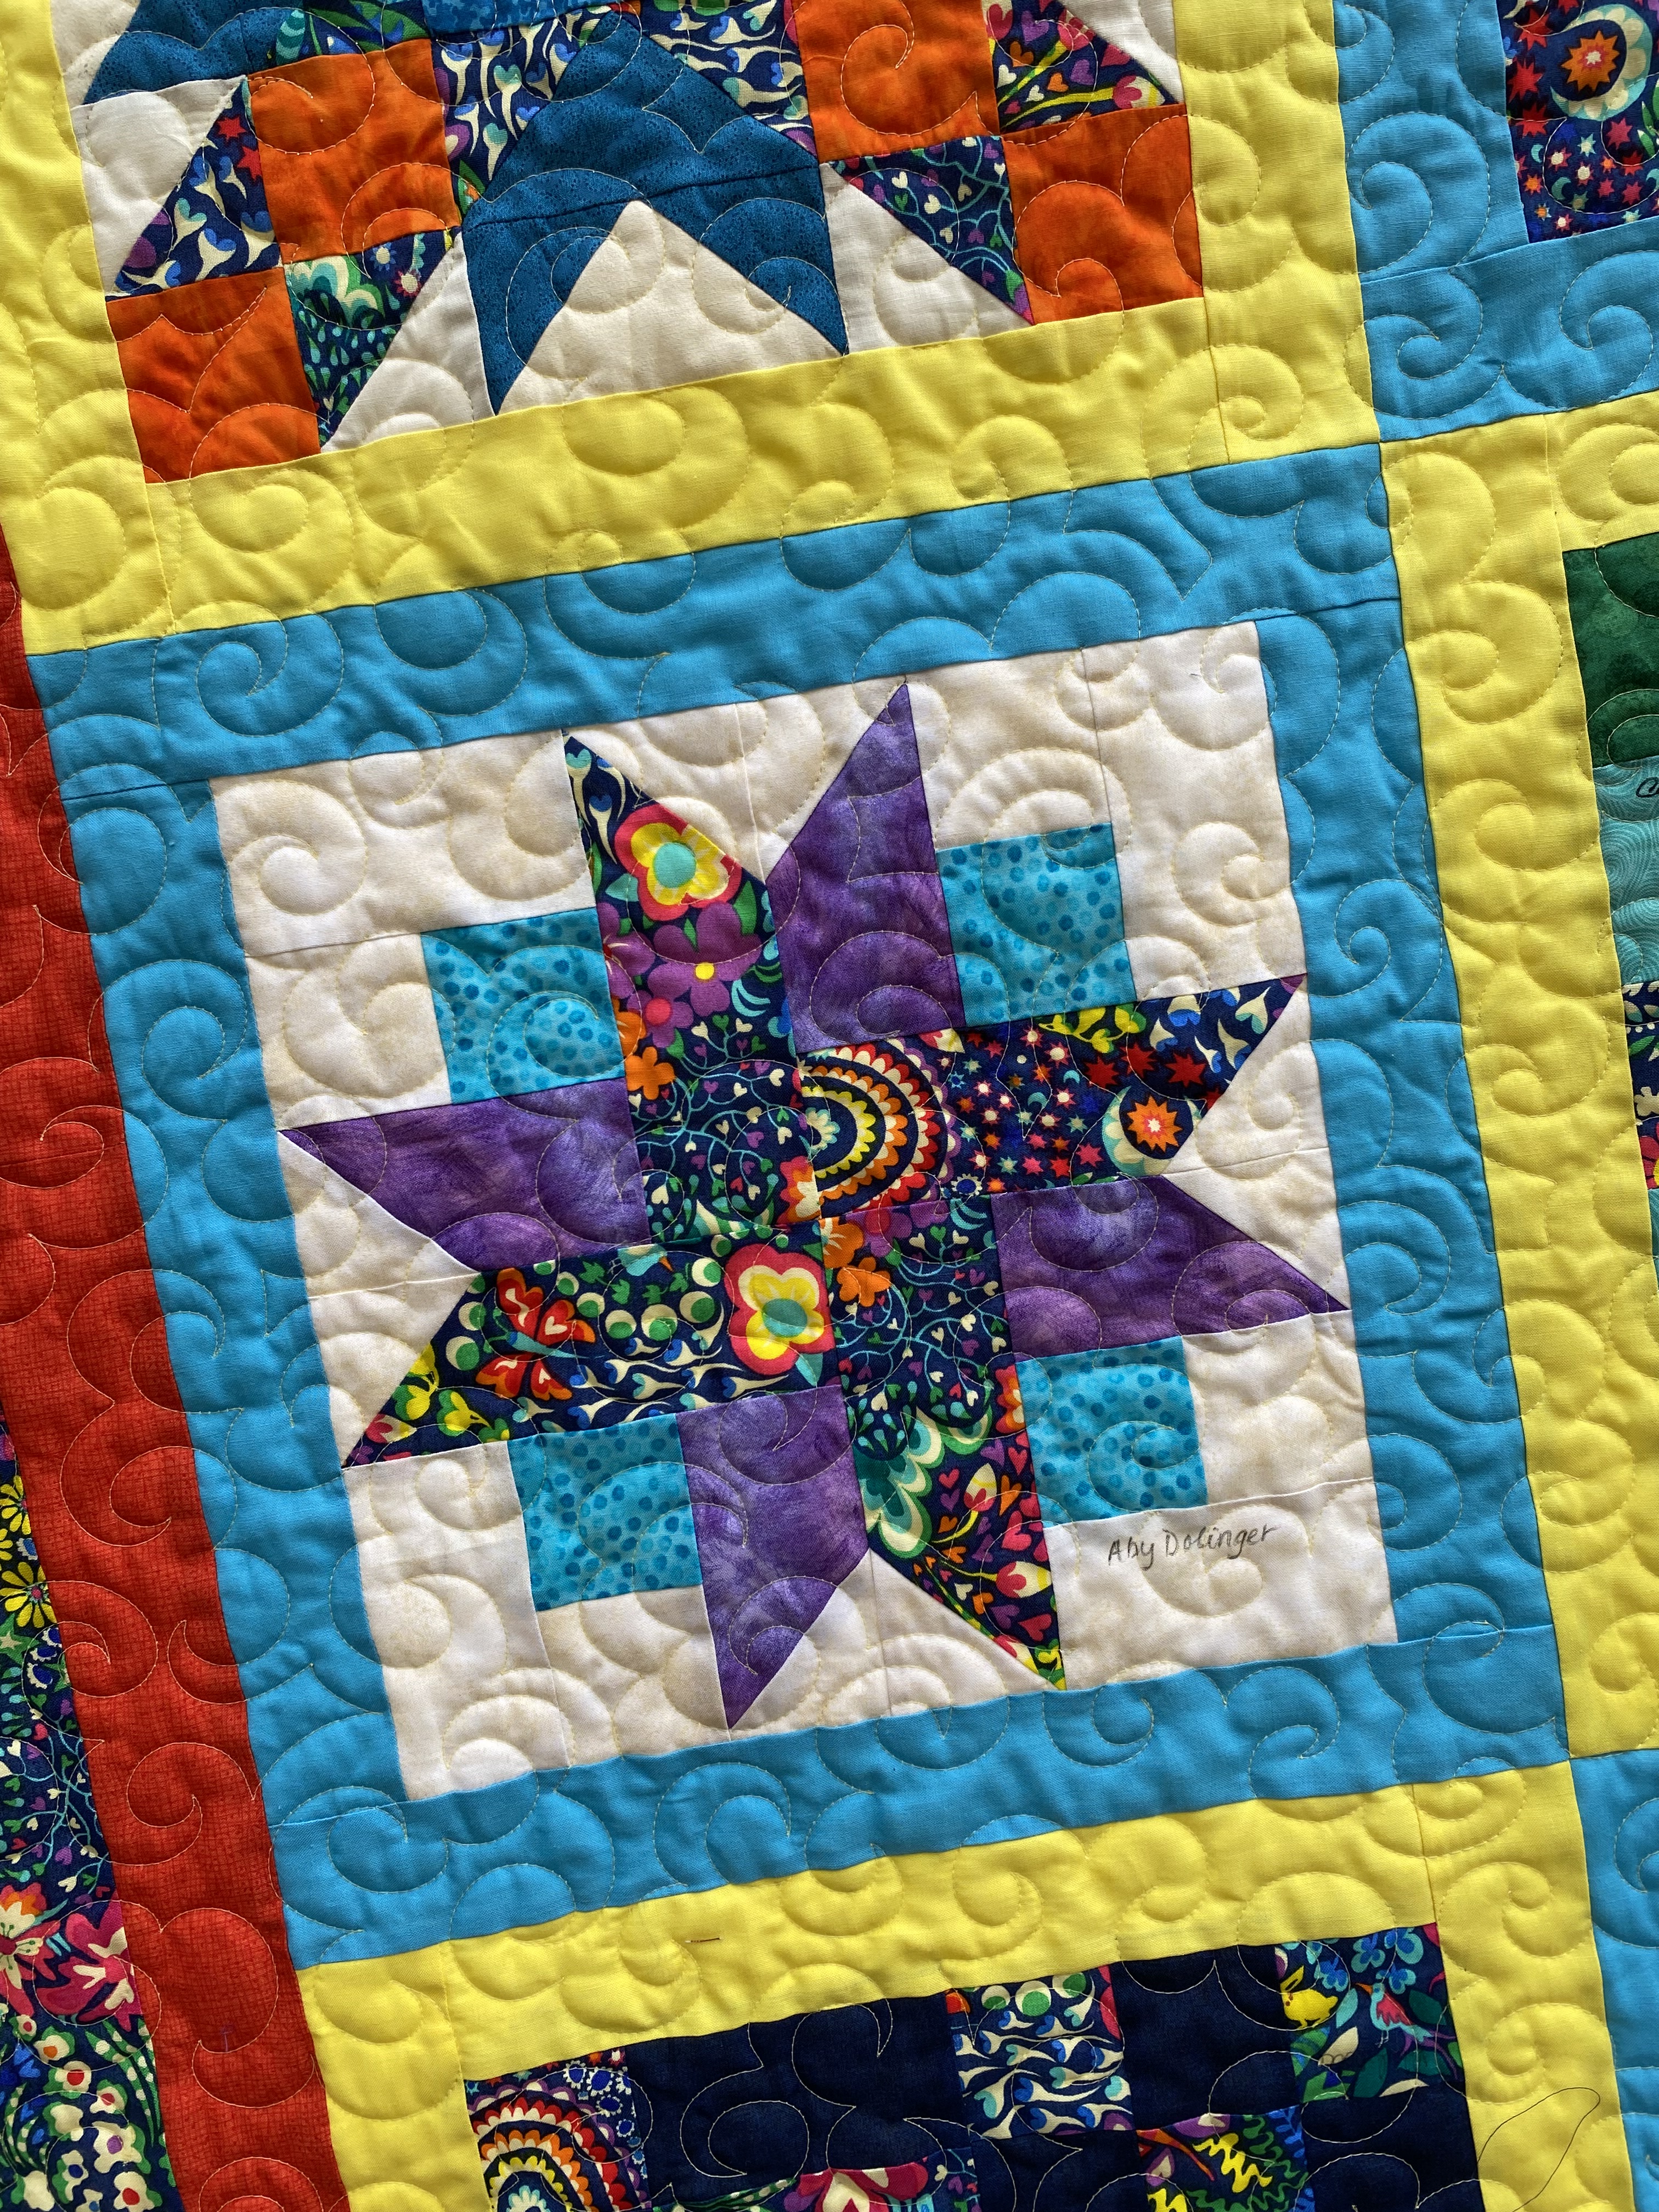
Jan emailed me a picture of her Tulip Star, April’s assignment for the “Barn Star Sampler” block of the month. I love the subtle shading of the fabrics she selected from her fat quarter stack!

I am also facilitating the “Blushing Blooms” BOM at Sew There! Quilts and More in Angier, NC. Perhaps you have noticed the picture of the pink and burgundy quilt in the header of this blog. The header picture shows some of the blocks included in this sampler quilt designed by Kaye England. The assignment for April was making five Tulip blocks, and Terry did a wonderful job sewing hers. (Click here to see a picture of the entire quilt. Bonnie at Sew There! has month-by-month kits if you are interested in making this gorgeous quilt.)

Thanks, ladies, for sharing pictures of your quilts and blocks. Seeing your progress and creative ideas inspires us!

Ribbon Star and Chain Workshop

On Saturday I spent time with the Foothills Quilters Guild in Shelby, NC. The group wanted to learn how to make Ribbon Star and Chain quilts, and they engaged me to teach a workshop. The supply list was simple – a jelly roll of forty-two 2 1/2″ wide strips plus 2 1/2 – 3 yds. of background fabric. Look closely to appreciate the various fabrics and alternate background colors.

The blocks made with purple batiks were especially admired.

Alas, I did not have my sample quilt to show the workshop participants because I gave it as a wedding gift last November. But my good friends, Colleen and Valerie, lent me their quilts to inspire the ladies.

Colleen’s quilt

Valerie’s quilt

In the five hours we were together, the quilters made great progress and had a fabulous time chatting and laughing as they sewed. If you live near Shelby, I recommend connecting with this guild (info@foothillsquiltersguild.org). If your group would like to invite me as a workshop presenter, contact me by email: aby.quilts@gmail.com.

Finished: Sampler of Exchanged Blocks

Crossroads Church of Lillington, where I am a member, sponsors a crafting/quilting group, the Sew ‘n’ Sews, which meets on Wednesday mornings. (You are most welcome if you live locally!) Last year we exchanged blocks, each of us making sixteen, each of us making a different design. We purchased a bright print for everyone to use in her blocks.

Here are the blocks on my design wall. Aren’t the block designs a wonderful mix of colors and complexity! Can you spot the common print fabric?

The exchage “rules” stated that the blocks should be 12 1/2″ unfinished, but invariably blocks made by different seamstresses will be different sizes depending on seam allowance variancies. When measuring the blocks, I noticed, with chagrin, that mine measured 12 3/4.” Instead of trimming all the blocks to the same size, I opted to add a frame around each block and then trim them all to the same size.

I purchased a yard each of bright blue and yellow solid fabric and cut 2 1/2″ wide strips for frames. After sewing and pressing the strips to the blocks, I trimmed them all to 16″ square. As you can see from the photo, I alternated yellow-framed blocks with blue-framed blocks.

I considered attaching a black inner border, but the quilt said, “Orange would be a better choice.” (When the quilt speaks, you gotta’ listen!) The 5″ outer border brings the total measurement to about 75″ square. For quilting, I chose yellow thread and freehand quilted Es and 3s all over. The binding is the same print fabric as the outer border.

Because each of the makers signed the blocks she contributed to the exchange, this quilt serves as a tangible memory of my Sew ‘n’ Sew quilting friends! It currently hangs over the bannister in our living room, adding a cheerful, springtime aspect to the decor.

Trending – the Potato Chip Block

It’s all the rage among scrap-using quilters. Search for it on YouTube and Pinterest and you’ll see what I mean! Video by Brenda of “Conquering Mount Scrapmore with Brenda” – https://www.youtube.com/watch?v=-lyBtI2086I, and video by Ginger of “The Copycat Quilter” – https://www.youtube.com/watch?v=Ka5QjvXA4Eo

This patchwork block is a great way to use 2″ x 3″ or 2 1/2″ x 4 1/2″ rectangles. Do you cut and save rectangles in these sizes? I have a container chock full of the 2 1/2″ x 4 1/2″ size and a baggie full of the smaller size. Either size can be cut from leftover jelly roll strips, 5″ charm squares, or 10″ layer cake squares.

Since my Checkerboard quilt is complete, I need a new scrappy quilt block for a leader and ender project. I choose the Potato Chip Block! Would you like to sew along with me this spring, turning our rectangles into blocks and our blocks into quilts? I’m planning to donate my quilt to a veteran as I’ve heard many of them prefer old-fashioned scrap quilts like their grandmothers made.

Basic Instructions: Sew two rectangles together. Then, with the seam placed vertically, sew one rectangle to the top and another to the bottom.

Sew together a pair of two rectangles and add one to each side of the unit made above.

Sew together another pair of two rectangles and add one to the top and one to the bottom of the unit.

Sew together two sets of three rectangles and add one to each side of the unit. Voila, your Potato Chip Block is complete.

Of the block arrangements I’ve seen, I prefer the look of alternating blocks having a dark outer ring with blocks having a light outer ring. So this is my plan!

Try making a Potato Chip Block. I bet you can’t make just one!

Checkerboard Finishes

My blue and “white” Checkerboard quilt is composed of 30 blocks each containing 36 squares. Since I had all of the fabric on hand, I think this qualifies as a “free quilt.” I used 2 1/2″ squares from my bin of scrap squares as well as 2 1/2″ strips from the strip container which I strip-pieced.

The diagonal arrangement of the dark and light squares of Checkerboard beg for straightline diagonal quilting, but I prefer using my longarm for quilts of this size, and curvy lines are much easier to execute than straight lines on longarm machines. I chose the “Happy Times” pantograph by Hermione Agee. The scale of the repetitive quilting motif is small enough to show well in the squares and add overall texture.

Keeping with the “free quilt” idea, I pieced the quilt backing from stash. I have long wanted to use the 2 yards of beautiful large-scale rose print. Since the yardage was not as wide as the quilt, I selected two coordinating blue prints and pieced them together. I separated these two major sections with a blue and ecru print, a cut-off from another quilt backing.

I am really enjoying decorating with and snuggling under this scrappy quilt. The finish is so satisfying I am tempted to make another Checkerboard quilt! Maybe I could tackle my bin of 3″ squares or perhaps my container of 2 1/2″ x 4 1/2″ rectangles.

Are you working on a Checkerboard quilt this spring? My friend, Maridee, sent a picture of her quilt. She also used scrappy 2 1/2″ squares. Look closely to see several half square triangles mingling with the squares. I love the scrappy binding which perfectly completes this cheerful, colorful quilt.

When you finish your Checkerboard quilt, please send a picture to my email address: aby.quilts@gmail.com. I would love to show blog readers your quilt, spreading the enthusiasm for this simple yet classic quilt design.

“Barn Star Sampler” BOM – Month #4

April’s block – Tulip Star

I hope you are sewing along with Shelley Cavanna’s Barn Star quilt project. The assignment for this month is a joy to assemble. I love this block so much! (Once I’ve finished all my UFOs, I am tempted to make a quilt of nine Tulip Star blocks.) If you are making a throw size quilt, make one Tuilp Star. If you are making the queen size quilt, make two Tulip Stars.

Happy Sewing! — Aby

Click here to watch the video of Shelley explaining the block’s construction.

Barn Star BOM – March Wrap-Up

Are you quilting along with us on the Barn Star Quilt designed by Shelley Cavanna? It’s never too late to join in! Just click on the “Barn Star BOM” tab in the menu for basic information regarding our 2024 quilt along.

Lucy sent a picture of the blocks she made in March. She made two each of Pinwheel Star and Weathervane Star for the throw or twin size quilt.

Connie also sent pictures of recent finishes. Windmill Star was a February assignment.

And Weathervane was slated for March.

Thanks, ladies for sharing your blocks! Way to go!

How about you? Have you completed the Barn Star blocks assigned for March? If you have, comment “Done” below to be entered into a drawing for a quilt magazine.

UFO Accountability Check for March

It’s been a great month for completing UFOs that have been lingering in my sewing room. First up are some pumpkin placemats begun last fall at a quilting retreat and finished this spring while on retreat. The pumpkins began as Log Cabin blocks, and the curves were created with a “peeled back patchwork” technique. (Click here for a demo of this technique on a flower design.)

I also completed “Crossroads” and “Flurry.” Click here to read about “Crossroads.” Click here to read about “Flurry.”

If you’ve been following my blog in March, you’ve seen several new projects completed as well. My “Sixteen Patch” quilt in red, white, and blue was on my bucket list, and I’m happy to say it is quilted, bound, and labeled! I also made “Around the Bend,” a sample for a class I’ll teach this spring and summer at Sew There! Quilts and More in Angier, NC.

“Around the Bend”

What, you may ask, will I be working to complete in April? I’ve chosen two sampler quilts one of which includes sixteen exchange blocks. The other quilt is composed of blocks I’ve made from Christmas fabrics. Both projects are fairly large, but here’s hoping I’ll find time to finish them this spring.

“Crossroads” Quilt Finished

I first saw the “Crossroads” quilt a couple of years ago on Instagram and was captivated by its simplicity. The homey and uncomplicated appearance evidently also appeals to many quilters; take a look at other renditions by searching for #treehousecrossroadsquilt. The design originates from Treehouse Textiles, a shop in Victoria, Australia, but quilters all over the world have been inspired to recreate it.

Although some quilt-makers have selected bright, coordinated fabrics for “Crossroads,” I determined to include fabrics from an old suitcase I found in a closet under the stairs of my grandmother’s cottage, combining them with lesser-loved fabrics from my own stash. I wanted my “Crossroads” to exude a comfortable utilitarian vibe. Most of the fabrics are muted rather than bright, and some are medium in value.

The quilting is simple meandering with tan thread, and I pieced together odds and ends of binding leftover from other projects to complete the scrappy look. I imagine this is a quilt my husband’s grandmother would approve. She and her relatives made simple quilts, using fabric on hand, solely to keep the family warm on freezing winter nights in Virginia’s Appalachian Mountains.

Granny Dolinger’s utility quilt

I began working on “Crossroads” blocks for the quilt at a 2022 retreat and finished putting it all together during the 2024 retreat. I anticipate curling up under it to peruse a quilting magazine in front of a cozy fire in times to come. It’s the type of quilt to use on a picnic or to huddle under at a frosty sporting event. It’s the type of quilt you wouldn’t mind the grandkids using for a fort, and you wouldn’t even be upset if the dog or cat fell asleep on it occasionally. It’s the type of quilt to be enjoyed and used, like Granny’s quilt, until it is worn out.